Welcome to your ultimate guide on how to build a deck with a roof in NZ, where we’ll take you step by step through the process of creating a functional and stylish outdoor space that’s perfect for Kiwi living. Whether you’re dreaming of a cozy spot to enjoy your morning coffee or a sheltered entertainment area for barbecues and gatherings, a deck with a roof offers the perfect solution for New Zealand’s ever-changing weather. In this guide, we’ll cover everything from design and materials to local building regulations and practical tips to help you get started, ensuring you can confidently build a deck that suits your lifestyle and complies with NZ standards.
To build a deck with a roof in NZ, start by planning your design, selecting materials like treated timber and polycarbonate or Colorsteel for the roof, and ensuring compliance with local building codes. Prepare the site, construct a sturdy deck frame, and install decking boards. Next, attach the roof structure securely to the deck and house, ensuring proper drainage and weatherproofing. It’s important to follow NZ safety standards for railings and steps. For large or complex projects, consider hiring a licensed builder. Regular maintenance will keep your deck and roof in top shape for years to come.
Table of Contents
Planning Your Deck With A Roof
Adding a deck with a roof to your home can significantly enhance your outdoor living space, offering protection from the elements and creating an ideal spot for relaxation, entertainment, or family gatherings. However, proper planning is essential to ensure your deck is not only beautiful and functional but also compliant with local regulations. Below, we’ll explore key factors to consider when designing a deck with a roof, specifically tailored to the unique needs of New Zealand homeowners.
Choosing the Right Design
When planning your deck, selecting the right design is crucial. Common deck styles include:
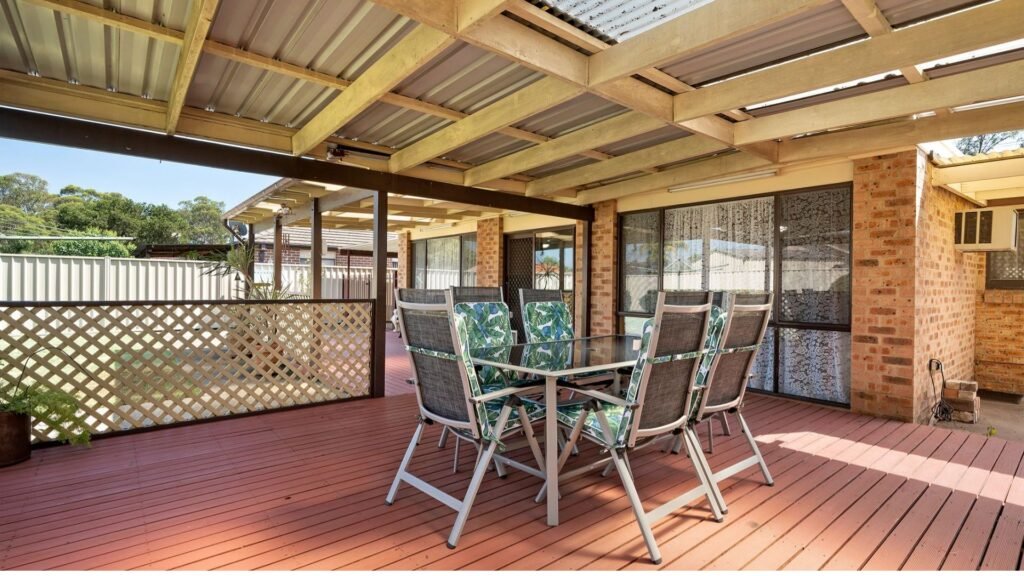
- Elevated Decks: These are ideal for homes on sloping sections or those with a second story. An elevated deck offers stunning views and can be paired with a roof to create a year-round outdoor space.
- Ground-Level Decks: Easier to build and more cost-effective, ground-level decks suit flat terrains. Pairing them with a pergola or flat roof can enhance their usability in all weather conditions.
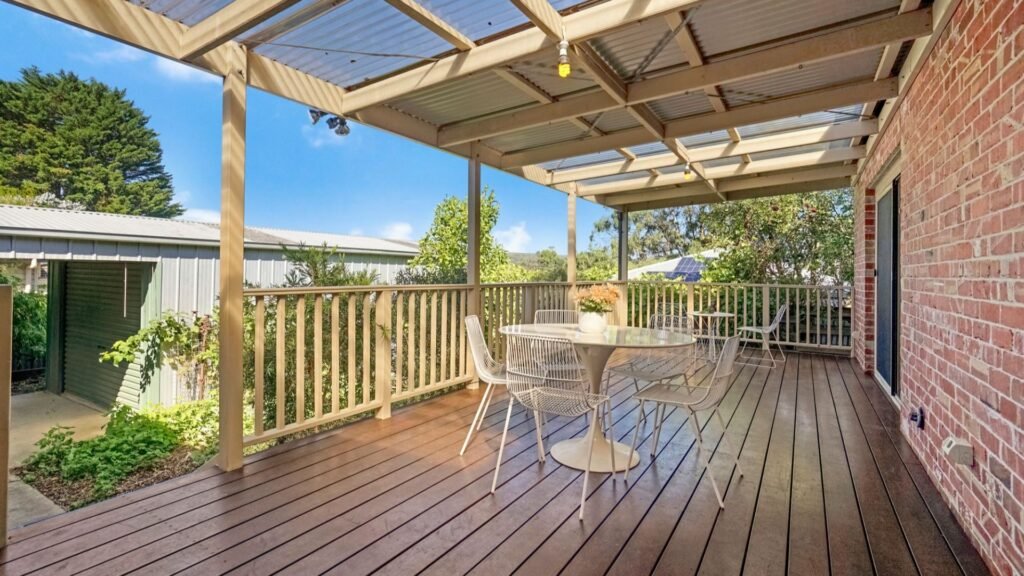
- Attached Decks: These decks connect directly to your home, often extending the living space. They work well with gable roofs or flat roofs, depending on your home’s architecture.
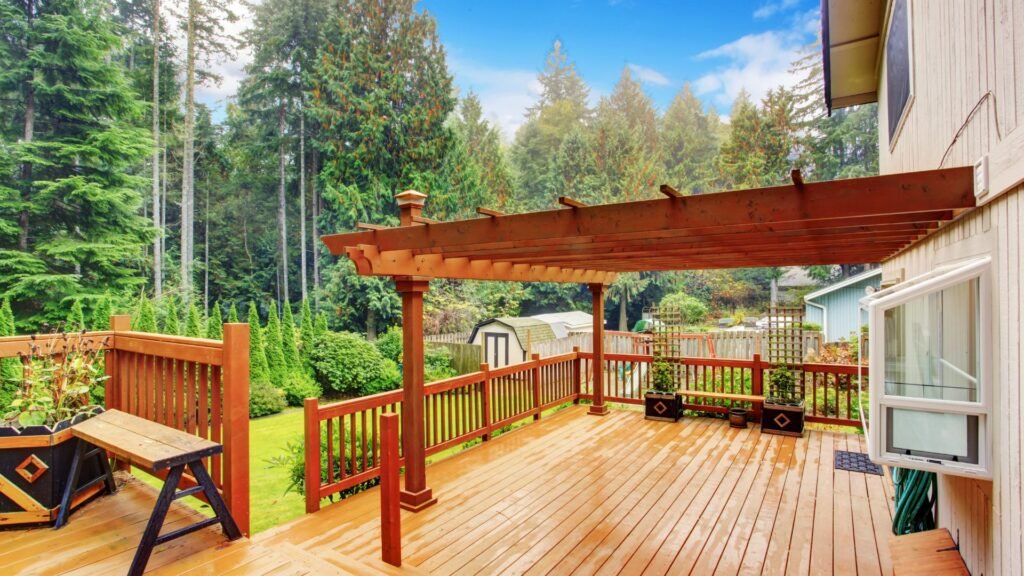
- Freestanding Decks: These are independent structures, perfect for creating an intimate garden oasis. A pergola-style roof works beautifully with this type of deck, providing shade while maintaining an open feel.
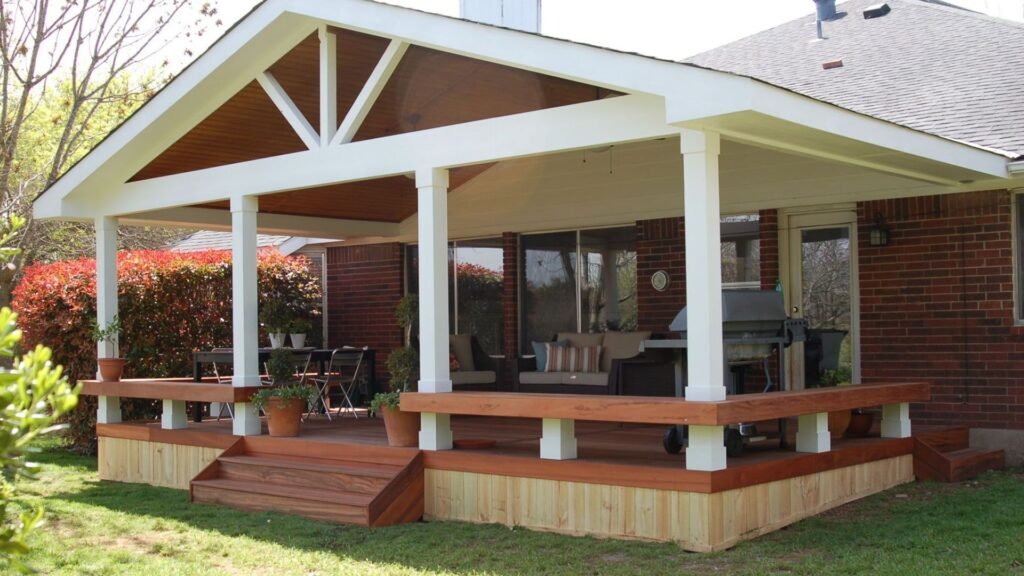
The roof design you choose will depend on both the deck style and your personal preferences. For instance, gable roofs offer a traditional look with excellent water drainage, flat roofs provide a modern, minimalist aesthetic, and pergolas add a touch of elegance while offering partial shade.
Purpose of the Deck
Defining the primary purpose of your deck will help guide decisions regarding its size, shape, and roof type. For example:
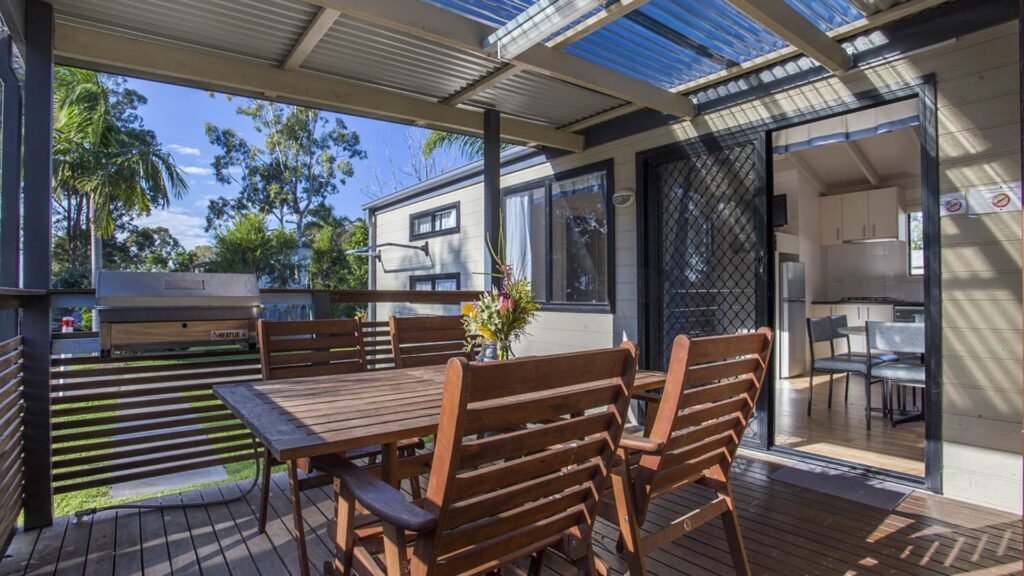
- Entertainment: If your deck will be used primarily for entertaining guests, you might want a larger deck with plenty of seating areas. A gable roof or flat roof can provide ample shelter from rain, allowing for year-round use.
- Relaxation: For those seeking a quiet outdoor space to unwind, a smaller deck with a cozy nook and a pergola roof might be ideal. Pergolas allow dappled sunlight to filter through, creating a tranquil environment.
- Family Space: If your deck is a gathering place for family activities, consider a spacious design with a sturdy roof to protect against New Zealand’s changing weather. Incorporating an outdoor kitchen or barbecue area can further enhance its functionality.
Positioning and Orientation
Where you position your deck can greatly affect its comfort and usability. Consider the following factors when choosing the location:
- Sunlight and Shade: In sunny regions like the Bay of Plenty, a north-facing deck will maximize sunlight throughout the day, making it ideal for outdoor activities. However, in hotter climates, you may want to include a roof that provides shade during peak hours.
- Privacy: If your home is in a suburban area, you might want to position your deck to maintain privacy from neighboring properties. Strategic placement of the roof and the use of privacy screens or plants can enhance the sense of seclusion.
- Wind Protection: For homeowners in windy areas, such as Wellington, consider positioning the deck on the leeward side of the house to minimize wind exposure. The roof can also serve as a windbreak, adding to the overall comfort.
Budget Considerations
Budget plays a significant role in any home improvement project. When planning your deck with a roof, be mindful of the following cost factors:
- Materials: Decking materials range from affordable treated pine to more expensive hardwoods or composite materials. Similarly, roof materials such as Colorsteel or polycarbonate can vary in price depending on durability and aesthetic.
- Labor: Hiring skilled builders or contractors is essential for a safe and professional installation. Labor costs will vary depending on the complexity of the project and your location within New Zealand.
- Permits: Council permits are required for certain deck and roof structures, and the cost can vary based on your local council’s regulations. It’s essential to factor this into your budget.
- Unexpected Expenses: Don’t forget to account for potential surprises, such as drainage issues or foundation reinforcements, which may arise during construction. Setting aside a contingency budget will help avoid stress down the road.
Council Permits and Building Code
Before starting your deck project, make sure to check the building regulations in your area. You can find detailed information on building consent requirements on the Building Performance website provided by the New Zealand Government. Failure to comply with local laws can result in fines or the need to modify or remove your deck. Key considerations include:
- Building Height: In many areas of New Zealand, decks that are more than 1.5 meters above the ground may require a building consent. Roofs attached to decks might also need specific approvals depending on their size and structure.
- Size Restrictions: Local councils may impose limits on the size of decks and roofs, particularly in densely populated areas. It’s crucial to check with your local authority to ensure compliance.
- Useful Resources: For the latest information on building codes and permits, visit the New Zealand Government’s Building Performance website. You’ll find helpful resources and links to your local council’s regulations to ensure your project follows the correct process.
Planning a deck with a roof involves more than just choosing the right materials and design. By considering your purpose, positioning, budget, and local regulations, you can create an outdoor space that enhances your home and lifestyle. For New Zealand homeowners, adapting these tips to suit your region’s climate and council requirements will ensure a successful and enjoyable addition to your home.
Materials You’ll Need
Building a deck is a fantastic way to extend your outdoor living space, and selecting the right materials is crucial for ensuring durability, functionality, and aesthetic appeal. In this section, we’ll walk through the essential materials you’ll need for your deck project in New Zealand, including decking, roofing, and the necessary hardware to complete the job efficiently and safely.
Decking Materials: Choosing the Right Option for Your Home
When it comes to decking materials in New Zealand, there are several options available, each with its own set of advantages and drawbacks. Choosing the right one depends on your budget, maintenance preferences, and desired look.
1. Wood (Pine, Kwila, Vitex)
Wood remains one of the most popular choices for decking in New Zealand, offering a timeless, natural appearance that can blend beautifully with any outdoor space. Here are the main types of wood decking commonly used:
- Pine: This is one of the most affordable options and is widely available across the country. Pine decking is treated to resist rot and insect damage, making it a durable option for outdoor use. However, it does require regular maintenance such as staining or painting to prevent weathering over time.
- Kwila: Known for its deep, rich color, Kwila is a hardwood that’s incredibly durable and resistant to both wear and insect attack. Its natural oils help protect it from decay, but like all wood, it will still need occasional maintenance to retain its color and prevent greying due to UV exposure.
- Vitex: A tropical hardwood, Vitex is prized for its light, golden tones and is highly durable. It’s a sustainable option, often sourced from managed forests, which makes it an environmentally friendly choice. Like Kwila, Vitex requires oiling to maintain its appearance but is otherwise low-maintenance.
Pros of Wood Decking: Natural aesthetic, easy to source, and can be sanded and refinished over time.
Cons of Wood Decking: Requires regular maintenance and can be more expensive, particularly with hardwood varieties like Kwila and Vitex.
2. Composite Decking
Composite decking is an increasingly popular alternative to traditional wood, especially for homeowners seeking a low-maintenance option. Made from a blend of recycled plastics and wood fibers, composite decking offers the look of timber without the upkeep.
- Low Maintenance: Unlike wood, composite decking doesn’t need to be stained or painted, and it’s highly resistant to fading, scratching, and mold.
- Cost: While composite decking is often more expensive upfront compared to wood, its long lifespan and minimal maintenance costs can make it more economical in the long run.
- Appearance: Composite decking comes in a wide range of colors and textures, some designed to closely mimic the look of natural wood. However, some purists feel that it lacks the warmth and authenticity of real timber.
Pros of Composite Decking: Minimal maintenance, eco-friendly, long-lasting, and resistant to rot and insects.
Cons of Composite Decking: Higher initial cost, and some homeowners may prefer the look and feel of natural wood.
Roofing Materials for Decks in New Zealand
The type of roofing you choose for your deck will depend on the level of shelter you want and the overall design aesthetic. New Zealand’s weather can be unpredictable, so having a roof over your deck can make the space more usable year-round.
1. Polycarbonate Roofing
Polycarbonate roofing is a lightweight, cost-effective material that’s perfect for covering decks and outdoor spaces. Its key benefits include:
- UV Protection: Polycarbonate roofing provides excellent UV protection, making it ideal for sunny climates. It allows natural light to filter through while blocking harmful UV rays.
- Affordability: This is one of the most budget-friendly roofing options available and is easy to install, which can help reduce overall construction costs.
- Durability: Polycarbonate is highly durable and resistant to weathering, making it suitable for New Zealand’s varied climate.
2. Colorsteel Roofing
For a more robust and long-lasting solution, Colorsteel roofing is a popular choice, particularly for those looking to match their deck roof with their house roof.
- Durable and Weather-Resistant: Colorsteel is known for its durability and ability to withstand New Zealand’s tough weather conditions, including high winds and heavy rain.
- Variety of Colours: Available in a range of colours, Colorsteel can be tailored to suit the aesthetic of your home.
- Low Maintenance: Once installed, Colorsteel requires very little maintenance and offers a sleek, modern look.
3. Timber Slat Roofs or Pergolas
If you prefer a more open design while still offering some shelter from the elements, timber slat roofs or pergolas are an attractive option.
- Open-Air Design: These structures allow for natural light and air to flow freely, creating a breezy, open feel that’s perfect for outdoor entertaining.
- Customizable: Timber slats can be spaced as tightly or loosely as you prefer, depending on how much shelter you want to provide. Pergolas can also be designed with climbing plants or fabric coverings for added shade.
- Aesthetic Appeal: Timber roofs and pergolas lend a natural, rustic charm to your outdoor space, blending well with both traditional and contemporary home designs.
Hardware and Fasteners: The Essential Building Components
To construct a solid, long-lasting deck, you’ll need more than just decking and roofing materials. Here’s a quick rundown of the essential hardware and fasteners you’ll require:
- Treated Timber Framing: The foundation of your deck, treated timber framing ensures structural integrity and protection against moisture and insect damage.
- Posts and Beams: These provide the vertical and horizontal support for your deck, ensuring it remains stable and secure over time.
- Brackets, Screws, and Nails: High-quality brackets, screws, and nails are essential for securing the deck components together. Choose galvanized or stainless steel fasteners to prevent rust and corrosion.
Building a deck in New Zealand involves careful planning and choosing the right materials to suit your environment, design preferences, and budget. Whether you opt for the natural beauty of wood or the low-maintenance appeal of composite decking, each material brings its own benefits. Combine it with durable roofing and sturdy hardware, and you’ll have a deck that stands the test of time and becomes a favorite spot for outdoor living.

Step-By-Step Guide To Building Your Deck With Roof
Building a deck with a roof is a fantastic way to extend your living space and add value to your property. This step-by-step guide will walk you through the process, from site preparation to roof installation, ensuring that you have a sturdy, long-lasting, and compliant structure. Let’s dive into the details:
Step 1: Site Preparation
The first and most crucial step in building a deck is properly preparing the site. Start by marking out the area where the deck will be installed. Use stakes and string to define the perimeter, ensuring the layout is square. Next, clear the vegetation and any debris from the area to create a clean workspace.
Leveling the ground is vital for ensuring your deck sits evenly and securely. Depending on the terrain, you may need to remove soil or fill in low spots. Proper drainage is especially important, particularly in regions with heavy rainfall like Auckland or the West Coast of New Zealand. Ensure that water flows away from the foundation of your deck to prevent future issues like wood rot or foundation shifting.
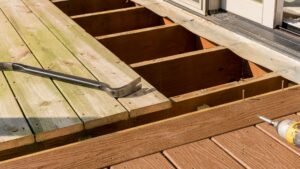
Step 2: Building the Deck Frame
With the site prepped, the next step is constructing the deck frame. This involves setting out footings or piles, which provide the foundation for your deck. Depending on the soil conditions and local building regulations, you may need to dig holes and pour concrete footings to anchor the posts securely. Ensure the placement is accurate by using a laser level or string lines.
Next, install beams and joists to create the framework. Be sure to adhere to New Zealand’s timber treatment standards, as this ensures your structure will withstand the country’s varying weather conditions. NZS 3602 outlines timber treatments suitable for outdoor use, protecting your deck from moisture and decay.
Keep the deck level by double-checking the alignment of your beams and joists. The sturdiness of the frame will determine the overall safety and durability of your deck, so take the time to get this step right.
Step 3: Installing Deck Boards
Once your frame is in place, it’s time to install the deck boards. Choose durable, weather-resistant materials like treated pine or hardwoods suited to outdoor environments. When laying the boards, leave a small gap (usually about 3-5mm) between them to allow for natural expansion and to promote water drainage.
A smooth and even surface is essential for both aesthetic appeal and safety. As you work, check that the gaps between boards are consistent to avoid any uneven spaces that could trap moisture or cause tripping hazards.
For additional protection, you may want to consider staining or sealing your deck. Stains can bring out the natural beauty of the wood, while sealants provide a protective layer against water, UV rays, and wear.
Step 4: Adding the Roof Frame
With the deck in place, the next step is to add the roof frame. Depending on your design, you may be attaching the roof to the deck frame and the house, or you may be constructing a freestanding structure. In either case, it’s essential to ensure that the roof beams are securely attached.
New Zealand’s building code has specific requirements for structural support, especially in areas prone to high winds like Wellington or coastal regions. You will need to use heavy-duty brackets and bolts to anchor the roof beams properly. Always check with your local council to ensure compliance with any regional building regulations.
Safety should be a top priority at this stage. Use appropriate protective gear, such as gloves, hard hats, and eye protection. Additionally, roof beams and materials can be heavy, so it’s best to have someone assist you during this step.
Step 5: Installing the Roof Covering
The final step in your deck building process is installing the roof covering. Polycarbonate and metal roofing are two popular options in New Zealand due to their durability and weather resistance. Polycarbonate is lightweight and lets light through, making it ideal for a more open feel, while metal roofing offers solid protection from harsh weather.
When installing the roof covering, ensure the material is attached securely to prevent shifting or lifting during high winds. Seal all joints and connections to prevent leaks—silicone or specialized roofing sealants work well for this.
To manage water runoff effectively, consider adding downpipes or gutters. This is particularly important in regions like Christchurch or Wellington, where heavy rain can accumulate. Proper drainage systems will prevent water from pooling on your deck or around your home’s foundation, protecting both your investment and your property.
Essential Tips For A Successful Build
Building a deck or roof that stands the test of time, especially in New Zealand’s often unpredictable weather, requires careful attention to several key factors. Here are essential tips that will help ensure your project not only looks great but also remains durable, safe, and functional.
1. Weather-Proofing: Protect Your Build from NZ’s Wet Climate
One of the most critical aspects of any outdoor construction in New Zealand is weather-proofing. The country is known for its heavy rains and high humidity, so proper sealing is essential to prevent water damage. Here are a few key practices for weather-proofing:
- Sealing Edges: Ensure that all the edges of your deck and roof are properly sealed. Water can easily seep into gaps and cracks, leading to rot, mold, or structural damage over time. Using quality sealants around the joints, corners, and anywhere two surfaces meet can prevent this from happening.
- Waterproof Membranes: Applying waterproof membranes is another important step. These membranes are typically installed between the deck’s surface and its supporting structure. This layer ensures that any water runoff does not penetrate into the wood or concrete below, which is vital for long-term durability.
- Weather Strips: Adding weather strips around windows, doors, and any other openings is an excellent way to block out moisture and wind. This is especially important if you’re working on a covered deck or roof space. Weather strips provide an extra line of defense against the elements, keeping the inside of your space dry and comfortable.
By taking the time to incorporate these weather-proofing techniques, you’ll significantly increase the lifespan of your build, making it more resilient to New Zealand’s frequently wet conditions.
2. Ventilation and Sunlight: Achieving Balance with Smart Design
While weather-proofing is important, you also need to ensure that your deck or roof structure allows for adequate airflow and natural light. A well-ventilated and sunlit space not only makes for a more enjoyable outdoor area but also helps prevent issues like mold growth or condensation buildup. Here are a few ways to design for ventilation and sunlight:
- Skylights: Incorporating skylights into your design is a great way to bring in natural light without sacrificing weather protection. Skylights can brighten up your deck or roof area, creating a more open and airy feel. Be sure to choose high-quality, leak-proof skylights that are built to withstand New Zealand’s weather conditions.
- Ventilation Gaps: Design your deck with small ventilation gaps between boards or under the structure itself. These gaps allow air to circulate, which helps to keep the area dry, reducing the risk of rot and mold. Proper ventilation also prevents heat buildup during warmer months, ensuring your space remains comfortable year-round.
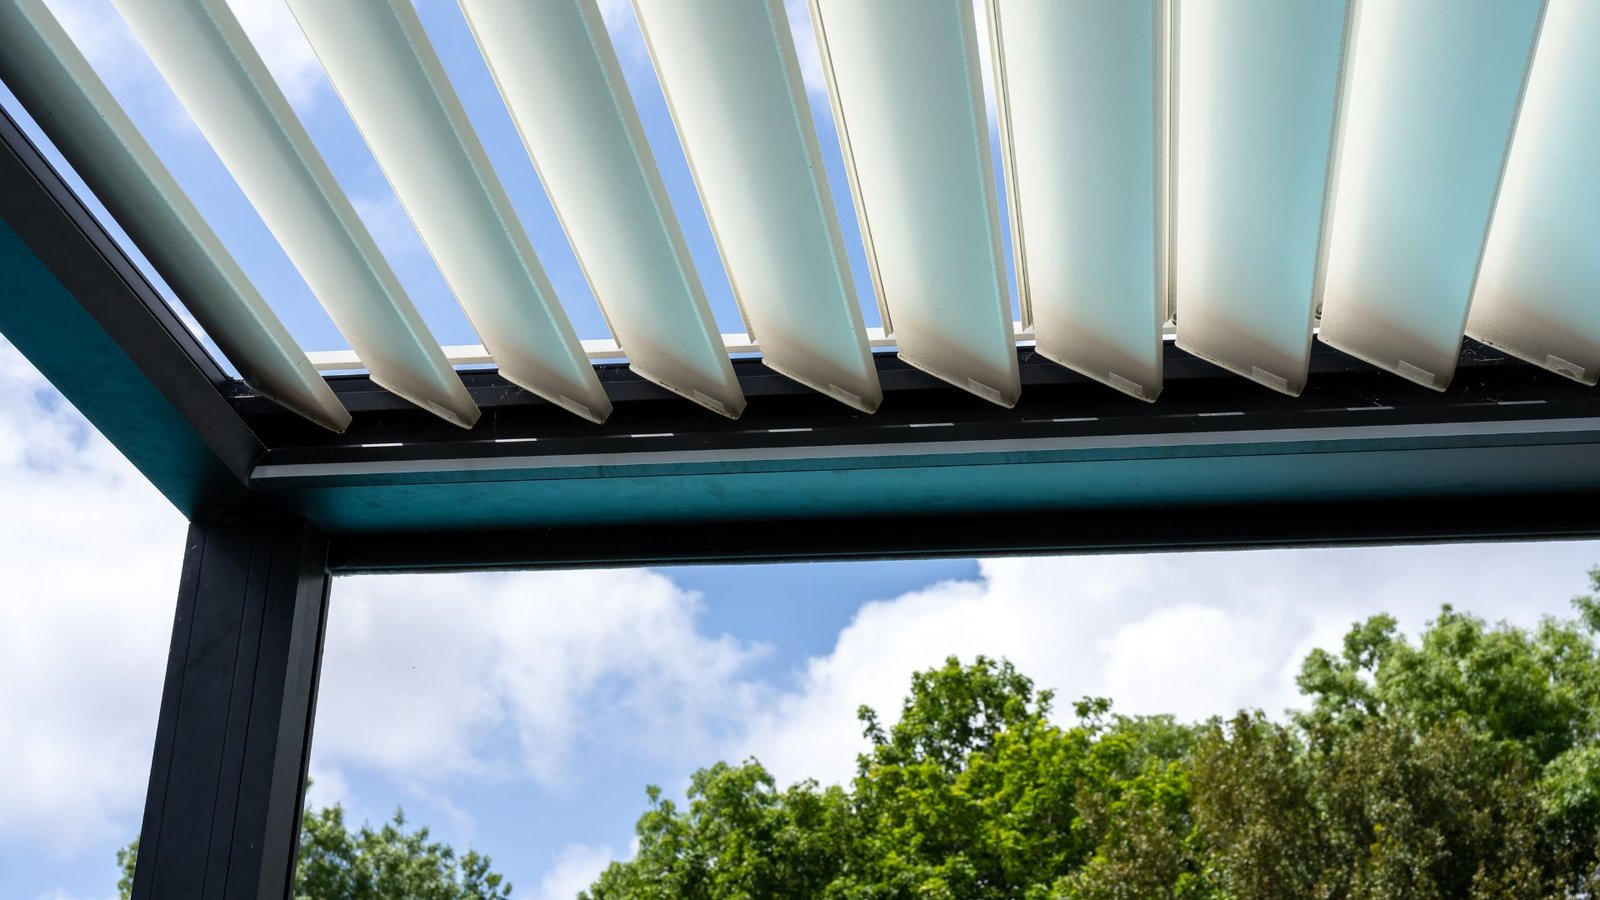
- Louvered Roofs: For covered decks, consider installing a louvered roof system. These adjustable slats can be opened or closed to let in sunlight or provide shade and ventilation as needed. This flexibility allows you to optimize airflow and light while still protecting your deck from rain or harsh sunlight.
Incorporating these design elements will ensure your deck or roof is not only practical but also pleasant to use in all seasons.
3. Maintaining Safety Standards: Compliance with NZ Regulations
Safety should always be a top priority in any building project, especially when it comes to decks. New Zealand has strict safety regulations regarding the construction of decks, particularly around areas like handrails, balustrades, and step heights. Ignoring these rules can lead to serious safety hazards, as well as potential legal issues down the line. Here’s what to consider:
- Handrails: NZ building regulations require that any deck more than one meter off the ground must have a handrail. These handrails need to be sturdy and at the correct height (typically between 900mm and 1000mm from the deck surface). They must also be able to withstand a certain level of force to ensure they’re secure.
- Balustrades: In addition to handrails, decks with a significant height off the ground must have balustrades to prevent falls. These barriers need to be at least 1 meter high and constructed from materials strong enough to prevent anyone from falling through them. For safety, the gaps between balusters must also be no larger than 100mm to prevent small children from slipping through.
- Step Heights: If your deck requires steps, make sure they comply with NZ building standards for step height and depth. Each step should be consistent in height to avoid tripping hazards, and the tread (step depth) should be wide enough to provide safe footing.
Following these safety regulations will help ensure your deck is safe for everyone who uses it and will also protect you from potential fines or legal issues related to non-compliance.
By paying close attention to weather-proofing, ensuring proper ventilation and sunlight, and maintaining strict safety standards, you’ll set your deck or roof project up for long-term success. Whether you’re working on a residential space or a commercial one, these essential tips will help you create a structure that is both functional and durable, perfectly suited for New Zealand’s unique climate and regulatory environment.
Hiring A Professional Vs. DIY
Building a deck can be a rewarding project that enhances your outdoor living space, but when it comes to deciding whether to take the DIY route or hire a professional, it’s important to weigh the pros and cons. Let’s dive into the details to help you make the right choice.
Pros and Cons of DIY Deck Building
If you’re considering a DIY deck-building project, there are definite advantages. First off, cost savings is a major factor. By doing the work yourself, you can eliminate labor costs, which often account for a large portion of the budget. Additionally, for those who enjoy hands-on projects, building your own deck can be deeply satisfying and give you a sense of accomplishment.
However, DIY projects aren’t without their challenges. Building a deck requires specific skills, tools, and knowledge of building codes, which may be outside the expertise of the average homeowner. Mistakes made during construction could result in costly repairs down the road or even pose safety hazards. Additionally, while you may save on labor costs, any missteps in planning or execution could lead to more expensive fixes later.
A DIY project might be a great choice for smaller, simpler decks, particularly if you have prior carpentry experience and feel comfortable following construction plans. But for larger, more complex builds, like multi-level decks or those that need special features, it may be best to seek professional help. Also, when dealing with factors like uneven terrain, complex roofing structures, or adding integrated features like lighting or railings, the technical expertise of a professional can save you time and frustration.
When to Consult a Builder
Knowing when to consult a licensed builder is crucial, particularly for larger or more intricate projects. While building your own deck might seem like an exciting challenge, it’s important to recognize when a job is beyond your scope.
Complex decks, especially those with multiple levels, roofing structures, or integrated features, require a solid understanding of structural integrity, which may be difficult for a non-professional to handle. Additionally, in many areas, building codes are strict, and non-compliance could mean your deck is unsafe or illegal. This could lead to fines or the deck being dismantled altogether.
If your project requires council approval or involves roofing elements, it’s usually mandatory to work with a licensed professional. Complex projects like these require precise structural calculations and adherence to local building regulations, which professionals are trained to navigate. This is where hiring a licensed builder becomes not just an option, but a necessity to ensure everything is done by the book.
By hiring a builder, you also benefit from their experience and the warranties they provide. Professional builders can typically complete the job faster and more efficiently, saving you time and minimizing disruption to your daily life. They will also make sure that everything meets safety standards, giving you peace of mind that your deck will stand the test of time.
Finding a Licensed Builder in NZ
If you’ve decided to hire a professional for your deck project, finding the right contractor is the next step. In New Zealand, it’s crucial to ensure the builder you hire is licensed and experienced in the type of work you need. Start by checking if the builder is registered with the Licensed Building Practitioners (LBP) scheme, which is a government initiative that ensures builders meet specific standards.
You can use the NZ Licensed Building Practitioners directory to search for licensed builders in your area. The directory provides important information such as their qualifications, areas of expertise, and whether they have any recent disciplinary actions against them. This gives you the confidence that you’re hiring someone reputable.
Before you commit to a contractor, always ask for references and, if possible, view some of their previous work. Speaking to past clients can provide valuable insight into their work ethic, reliability, and the quality of their workmanship. Additionally, ensure that they provide a detailed written quote and contract outlining the scope of work, costs, and timelines. This will help prevent misunderstandings and keep the project on track.
Another tip is to research reviews and ratings of local contractors on online platforms like Google or trade-specific sites. Many homeowners share their experiences, helping you identify reputable builders and avoid those with a history of problems.
By following these steps, you’ll be well on your way to finding a skilled, licensed builder who can help you create the perfect deck for your home.
In conclusion, whether you choose to build your deck yourself or hire a professional, making an informed decision will ensure a successful project. For small, straightforward decks, a DIY approach might work well if you’re confident in your abilities. However, for larger, more complex builds—particularly those requiring council approval or specialized expertise—hiring a professional builder is often the safer and smarter choice. Always remember to thoroughly vet any contractor through NZ’s Licensed Building Practitioners directory and take your time to find someone who aligns with your vision and budget.

Finishing Touches And Enhancements
When your deck roof is in place, it’s time to focus on those finishing touches that turn a functional space into a cozy, inviting outdoor retreat. The following enhancements can help you create a beautiful and practical space that’s perfect for relaxation, entertainment, and more.
Adding Lighting and Power
Outdoor lighting plays a critical role in setting the tone and functionality of your deck area. Whether you’re aiming for a soft, ambient glow to create a peaceful evening atmosphere or you need brighter lights for safety and visibility, there are plenty of lighting options to consider.
For ambiance, you might install string lights, lantern-style fixtures, or even recessed lighting in the ceiling of the deck roof. These options can provide a soft, warm glow perfect for evening relaxation or intimate gatherings. On the other hand, if your deck will also be used as a workspace or for evening entertaining, brighter lighting, such as overhead spotlights or wall-mounted fixtures, may be necessary.
In addition to lighting, consider the need for electrical outlets. Having access to power outside can be a game-changer, whether you’re plugging in a grill, running speakers for outdoor music, or charging devices. Working with a licensed electrician is crucial for installing outdoor outlets and wiring. This ensures everything is up to code, safe, and weatherproofed for long-lasting use.
Choosing Outdoor Furniture and Decor
Selecting the right furniture and decor is essential to complement your newly roofed deck area. It’s important to choose items that are not only visually appealing but also durable enough to withstand outdoor conditions.
Opt for weather-resistant materials like wicker, metal, or treated wood that can handle rain, sun, and temperature fluctuations. Comfortable seating such as cushioned chairs, lounges, or built-in benches can provide both style and relaxation. Outdoor rugs made from durable, moisture-resistant materials can add warmth and style to your space, creating a defined area under the deck roof that feels like an outdoor living room.
You can also add decor touches that personalize your deck. Throw pillows, cozy blankets, or even a stylish coffee table can elevate the design while making the space feel inviting.
Incorporating Greenery and Plants
Bringing greenery into your deck space can enhance its overall aesthetic, creating a tranquil, natural vibe. Planters are an easy way to introduce vibrant plants or flowers. You could place larger pots with leafy greenery in the corners, while smaller planters filled with bright blooms can be arranged on tables or along the edges of the deck.
Hanging baskets are another great option, especially if space is limited. They add height and visual interest while keeping your deck floor open. For a more modern and eco-friendly twist, consider adding a vertical garden. This feature not only adds beauty but can also improve privacy and air quality around your deck.
Ultimately, the finishing touches are what make your deck roof area truly shine. With the right combination of lighting, furniture, and greenery, your outdoor space can become a seamless extension of your home, perfect for relaxing, entertaining, or just enjoying the fresh air.
Maintenance And Longevity
Your deck and roof are critical components of your home, and regular maintenance is key to ensuring they last for years to come. Whether you live in humid areas like the Bay of Plenty or drier regions, following these simple yet effective maintenance steps will help you protect your investment and keep your outdoor spaces looking great.
Regular Cleaning Tips
Keeping your deck and roof free from debris, mold, and algae buildup is essential, especially in places with higher humidity. In regions like the Bay of Plenty, moisture can lead to faster accumulation of organic material, which can compromise both the appearance and the integrity of your outdoor surfaces. Here’s how to stay on top of cleaning:
- Sweep your deck regularly: Leaves, dirt, and other debris can trap moisture, leading to rot and mold growth. A simple sweep once a week can prevent this.
- Hose down surfaces: If debris or dirt has built up over time, give your deck and roof a gentle wash. A garden hose with moderate pressure works well for this.
- Use a mild cleaning solution: For more stubborn stains or mildew, use a mixture of warm water and mild detergent. Avoid harsh chemicals, as they can damage wood or paint finishes.
- Pressure washing: If necessary, pressure wash your deck at a low setting. This is particularly helpful for mold and algae, but be careful not to strip away paint or protective sealants.
Taking these steps regularly will not only keep your deck and roof clean, but it will also help prevent issues like rotting wood, algae damage, and unsightly discoloration.
Annual Inspections: What to Look For
An annual inspection is crucial for catching minor issues before they turn into costly repairs. Here’s what to keep an eye out for when inspecting your deck and roof:
- Roof inspections: Look for missing or damaged shingles, which can lead to leaks. Check for sagging areas that might indicate water damage beneath the surface. Pay attention to any signs of mold or moss, especially in the shaded areas of your roof.
- Deck boards: Walk across the deck and feel for any soft spots, which may indicate wood rot. Also, look for splintering or warping boards, as these can create safety hazards. Loose nails or screws should be tightened, and any severely damaged boards should be replaced immediately.
- Fastenings and structural supports: Examine the fastenings, such as screws and nails, for signs of rust or corrosion. These metal elements are critical to the stability of your deck, and if they show signs of wear, they should be replaced promptly.
Taking the time to conduct an annual inspection can save you significant money and stress in the long run by addressing small problems early.
Deck Resealing or Repainting: When and How
Resealing or repainting your deck is one of the best ways to protect it from the elements and extend its lifespan. Here’s a guide on when and how to tackle this important maintenance task:
- When to reseal or repaint: If your deck is wooden, it should be resealed every 2 to 3 years, depending on the climate. If the water no longer beads up on the surface of the wood, it’s time to reseal. Painted decks should be repainted every 5 to 7 years, or sooner if you notice the paint chipping or peeling.
How to prepare for resealing or repainting
1. Clean the deck thoroughly: Before applying any new sealer or paint, ensure the deck is free from dirt, grime, and old finish. Use a deck cleaner or mild detergent solution.
2. Sand if necessary: If the deck surface feels rough or has splinters, sanding it down can smooth things out and help the new finish adhere better.
3. Choose the right product: For resealing, opt for a water-repellent sealant designed for outdoor wood. If repainting, choose an outdoor-grade paint that’s weatherproof and UV resistant.
Application tips: Apply the sealant or paint evenly across the surface. It’s best to work in the cooler parts of the day to avoid rapid drying, which can lead to uneven finishes. Always allow the deck to dry completely before using it again, which could take up to 48 hours depending on the product.
By following these steps, your deck will stay protected against moisture, UV rays, and everyday wear and tear, preserving both its beauty and its structural integrity.
Regular maintenance not only keeps your deck and roof looking great but also ensures their longevity. By taking these proactive steps, you’ll minimize damage, reduce repair costs, and enjoy your outdoor spaces for years to come.

FAQs: About How To Build A Deck With Roof NZ
Do I need a permit to build a deck with a roof in New Zealand?
Yes, most councils in New Zealand require a building permit for decks that exceed a certain size or height, and especially if you’re adding a roof. It’s essential to consult your local council’s building regulations to understand the specific requirements and obtain the necessary permits before starting construction.
What types of roofs can I consider for my deck?
There are several types of roofs suitable for decks, including flat roofs, gable roofs, and hip roofs. The choice depends on your aesthetic preference, the design of your home, and how you plan to use the deck. Each type offers different levels of protection from the elements and integrates differently with your existing architecture.
What are the best materials for building a deck with a roof in New Zealand?
The best materials depend on durability, maintenance, aesthetic preference, and environmental conditions. Commonly used materials include treated timber for the deck and roofing materials like metal, asphalt shingles, or polycarbonate sheets. Choose materials that can withstand local weather conditions and complement your home’s exterior.
How do I design a deck with a roof?
Start by considering the purpose of the deck, your home’s current architecture, and the available space. Use design software or consult with an architect to create a blueprint. Ensure the design includes adequate load support, especially for the roof, and consider aspects like drainage and insulation.
Should I hire a professional to build my deck?
While some aspects of deck building can be DIY, hiring a professional is advisable for ensuring the structure is safe, especially when adding a roof. A professional can help with design, material selection, and construction, and ensure the deck complies with local building codes.
How much does it cost to build a deck with a roof in New Zealand?
Costs vary widely based on size, materials, and labor. A basic deck with a simple roof can start from several thousand New Zealand dollars, while more elaborate designs with high-end materials can cost significantly more. Always get multiple quotes to compare prices and check references before hiring a contractor.
How do I maintain my deck with a roof?
Regular maintenance includes checking for and repairing any damage, cleaning the deck and roof, and reapplying protective finishes as necessary. It’s also important to ensure gutters and downspouts are clear to prevent water buildup.
What common issues might I face with a deck with a roof?
Common issues include leaks, structural weakening, and damage from pests or weather. Regular inspections can help catch these issues early, and proper construction techniques and materials should minimize risks.
Can I build a deck with a roof on any type of ground?
Building on stable, level ground is ideal. If your ground is uneven, additional work may be necessary to level it or to build a suitable foundation that can support the deck and roof safely.
How long does it take to build a deck with a roof?
The time frame can vary from a few weeks to several months, depending on the complexity of the project, weather conditions, and whether you are doing it yourself or hiring professionals. Planning, obtaining permits, and ordering materials can also add to the timeline.
Conclusion
In conclusion, building a deck with a roof in New Zealand is an excellent way to enhance your outdoor living space, providing both comfort and protection from the elements. By carefully following key steps, from planning and designing to selecting materials and construction, you can ensure that your deck not only looks great but stands the test of time. Now is the perfect time to take that first step—whether it’s sketching out your ideas or consulting with professionals to bring your vision to life. If you have any questions or thoughts on your own deck-building project, feel free to share them in the comments, and don’t forget to pass this article along to friends who might be thinking about their own outdoor renovation.
About the Author:
Mike Veail is a recognized digital marketing expert with over 6 years of experience in helping tradespeople and small businesses thrive online. A former quantity surveyor, Mike combines deep industry knowledge with hands-on expertise in SEO and Google Ads. His marketing strategies are tailored to the specific needs of the trades sector, helping businesses increase visibility and generate more leads through proven, ethical methods.
Mike has successfully partnered with numerous companies, establishing a track record of delivering measurable results. His work has been featured across various platforms that showcase his expertise in lead generation and online marketing for the trades sector.
Learn more about Mike's experience and services at https://theleadguy.online or follow him on social media: