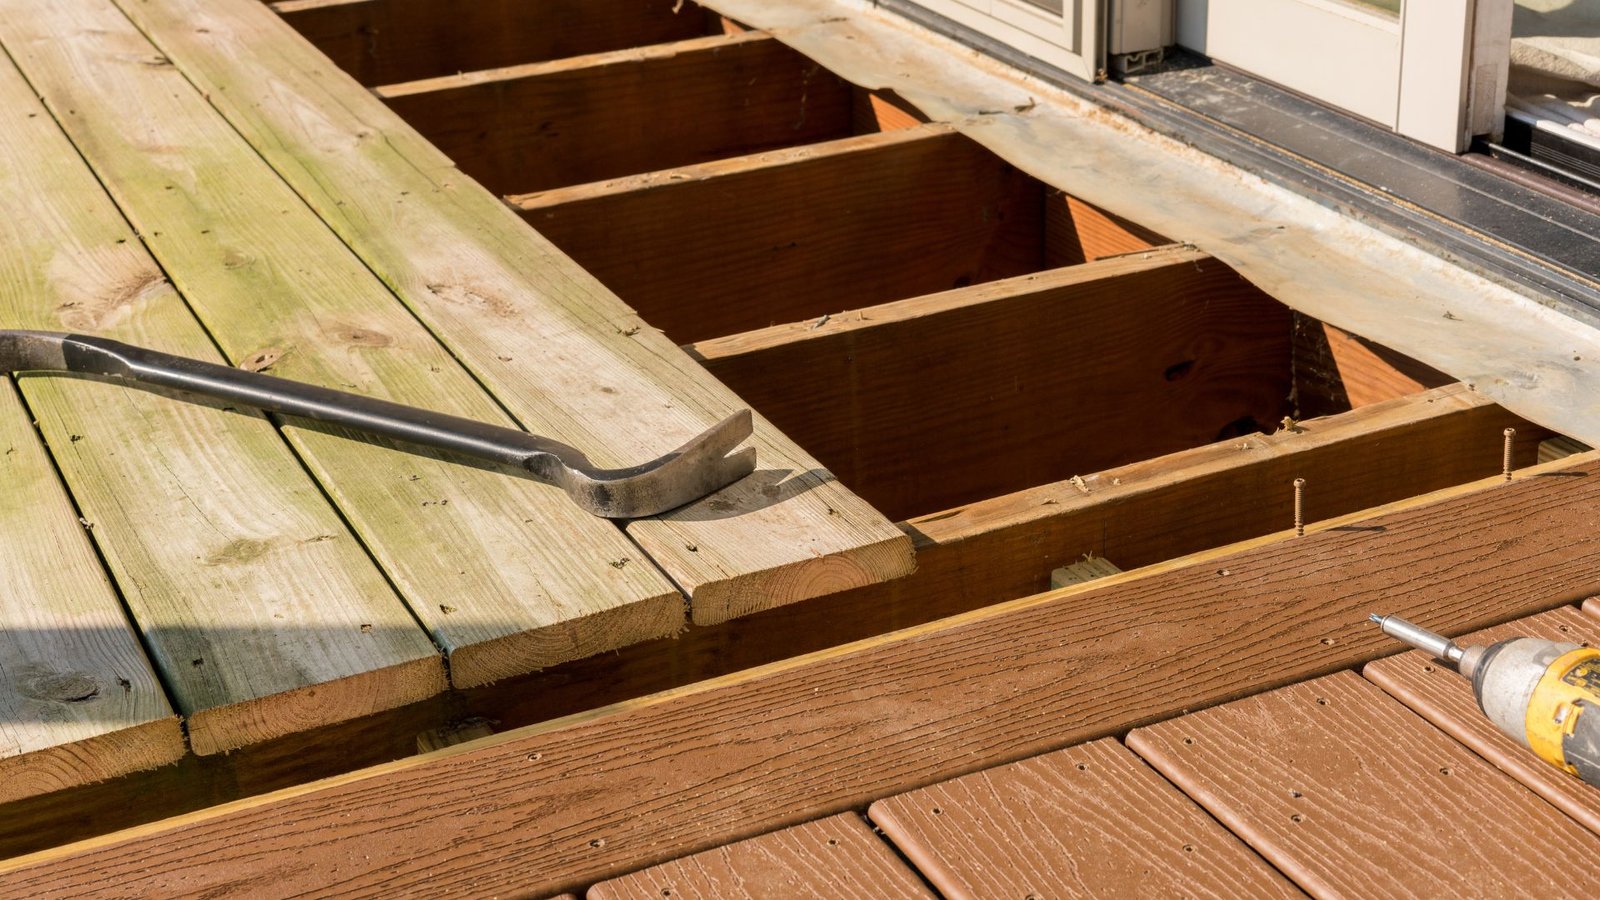
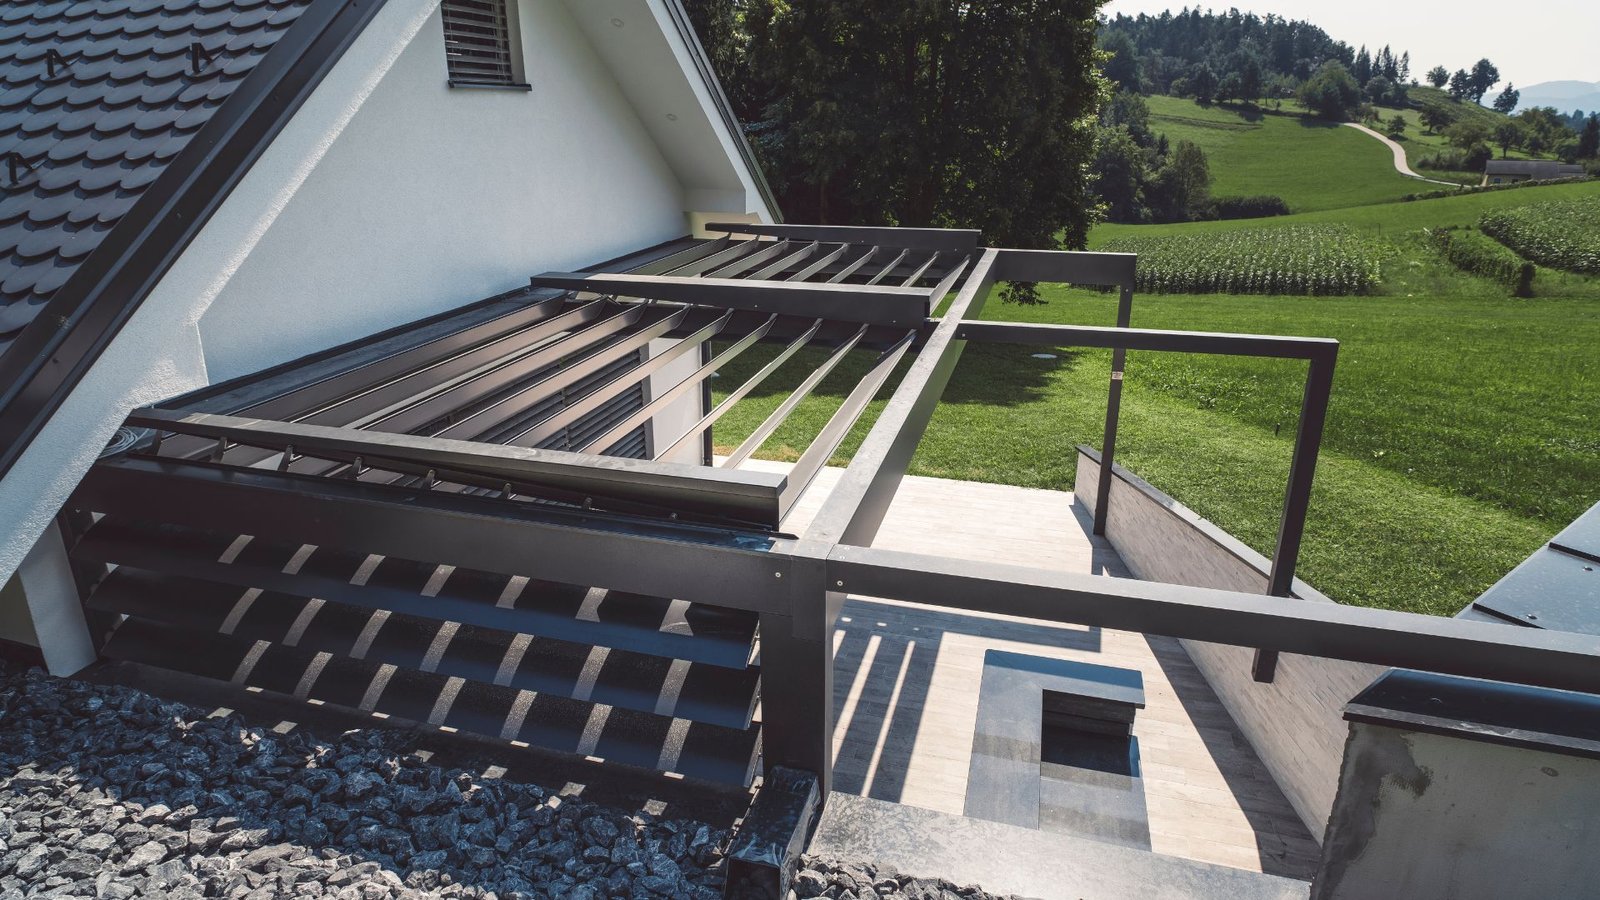
Welcome to your complete guide on building a deck in New Zealand! Whether you’re a DIY enthusiast looking to create a cozy outdoor space or simply want to know the ins and outs before hiring a professional, this step-by-step guide covers everything you need to know from initial planning and understanding NZ building regulations to choosing materials that suit New Zealand’s diverse climate. With clear instructions, helpful tips, and an overview of common mistakes to avoid, this guide is designed to help you create a beautiful, lasting deck that enhances your outdoor living space and complies with local building standards. Let’s get started on transforming your backyard into the perfect Kiwi retreat.
To build a deck in New Zealand, start by planning your deck’s size, purpose, and location, considering local building regulations. Choose durable materials like treated pine or hardwood suited to NZ’s climate, and gather essential tools such as saws, levels, and drills. Obtain necessary council consents for decks over 1.5 meters high. Prepare the site, lay a stable foundation, build the frame, and securely install decking boards. Finish with protective staining or sealing to withstand weather and regular maintenance. Proper planning and quality materials ensure a long-lasting deck for Kiwi outdoor living.
Table of Contents
Planning Your Deck
Creating a beautiful, functional deck begins with thoughtful planning. When you start with a clear vision and practical steps, you can build a deck that not only adds value to your property but also enhances your outdoor experience. Here’s a guide to help you kick off your deck project with confidence.
Assess Your Space
Before jumping into deck designs, it’s crucial to evaluate the layout and dimensions of your outdoor space. Take a moment to look around your backyard or outdoor area and identify potential spots for your deck. Ask yourself these questions.
- Sunlight and Shade: Where does the sun hit during the day? A south-facing spot will get more sunlight, while a shaded area might be more comfortable during peak sun hours.
- Viewpoints: Consider the views you want to highlight or avoid from your deck. For example, a deck overlooking your garden can be an aesthetic choice, while one too close to a neighbor’s fence might lack privacy.
- Terrain and Ground Level: Look at the slope and level of the ground. A sloping yard may need extra structural work, while a level area could simplify construction.
This careful assessment ensures that your deck’s location harmonizes with your yard and provides a comfortable space for all your planned activities.
Purpose and Style
Once you’ve selected a potential location, think about how you plan to use the deck. The deck’s purpose will shape everything from its size to the type of furniture you choose. Here’s a look at popular deck functions.
- Entertaining: If you plan to host family gatherings or social events, a larger deck with ample seating, a dining area, and perhaps even space for a BBQ or bar may be ideal.
- Dining: A cozy outdoor dining area may require less space but should allow enough room for a table, chairs, and space for people to move around.
- Relaxing and Lounging: Want a tranquil retreat? Consider adding lounge chairs, a small table, or even an outdoor sofa to create a relaxed, spa-like setting.
Shape and style should also align with your home’s architecture. For example, a modern, sleek deck design might suit a contemporary house, while a classic, rectangular deck could match a more traditional home aesthetic.
Understanding NZ Building Regulations
In New Zealand, building regulations play an essential role in deck construction. Compliance with these regulations is crucial for both safety and legal reasons, and they help ensure that your deck is safe and well-constructed.
One key regulation to know is the height restriction. According to New Zealand’s building code, you will generally need building consent if your deck is more than 1.5 meters above the ground. This requirement is part of a broader set of guidelines to prevent falls and injuries. Additionally, decks over 1.5 meters high may require handrails or barriers.
For accurate and up-to-date information, review New Zealand’s official building guidelines, as they provide a detailed outline of the necessary permits, construction rules, and safety measures required. Visit New Zealand’s Building Performance website for more information on building regulations.
Planning for Costs and Materials
Budgeting is essential for any construction project, and decking is no exception. Establishing a budget early on will help you prioritize spending and avoid unexpected costs. Here’s a quick breakdown of key budgeting considerations.
- Materials: Timber is a popular choice, but composite materials, treated wood, and hardwood options are also available. Each has a different price point, lifespan, and maintenance level.
- Labor: If you’re hiring professionals, research local rates for deck building. Some builders charge by the square meter, so larger decks will naturally increase costs.
- Permits and Fees: If your deck requires consent, include the cost of permits and any inspection fees in your budget.
Taking the time to calculate costs for materials, labor, and permits will help you make informed decisions throughout the building process. With a clear budget, you can ensure that your deck meets both your design dreams and practical needs. By starting with these four foundational steps, you’ll be well on your way to creating a deck that perfectly fits your home and lifestyle. Whether you’re dreaming of a cozy space to unwind or an entertainment hub for friends and family, thoughtful planning will make all the difference.

Choosing The Right Materials For NZ Conditions
When building a deck in New Zealand, choosing the right materials is crucial. The deck’s durability, appearance, and performance will largely depend on this choice, especially given the country’s unique climate. Let’s explore some of the top decking materials used in NZ, focusing on their pros and cons in terms of durability, cost, and aesthetics, while also considering weather resilience and sustainability options.
Popular Wood Types for NZ Decking
In New Zealand, three main materials dominate the decking market: pine (pressure-treated), hardwoods, and composite decking. Each comes with distinct advantages and limitations, so knowing their characteristics will help you make the best choice.
Pine (Pressure-Treated)
- Overview: Pine is one of the most commonly used decking materials in NZ, primarily because it is readily available, affordable, and treated to withstand the elements.
- Durability: Pressure-treated pine has been chemically treated to resist decay, insects, and moisture. However, while it holds up well in most weather conditions, pine generally requires regular maintenance to maintain its appearance and prevent rot over time.
- Cost: Pine is usually the most budget-friendly option, making it ideal for those looking to save on initial costs.
- Aesthetics: While pine has a classic timber look, it doesn’t naturally boast the rich color or grain seen in hardwoods. Some homeowners prefer to stain or paint it for a customized appearance.
- Summary: Pine is affordable, moderately durable, and versatile in terms of finishing. However, it requires consistent upkeep to prolong its lifespan and maintain its look.
Hardwoods (e.g., Kwila, Vitex, Garapa)
- Overview: Hardwoods like Kwila, Vitex, and Garapa are known for their dense structure and rich, natural hues, which give decks a luxurious and timeless appeal.
- Durability: Hardwoods are inherently resilient, especially when it comes to resisting wear and tear from high foot traffic. They stand up well to New Zealand’s variable weather, from UV rays to high humidity.
- Cost: While hardwood decking can be significantly more expensive upfront than pine, its longevity and minimal maintenance can make it cost-effective over the long run.
- Aesthetics: Hardwoods have a naturally beautiful look, with rich, varied tones and striking grain patterns. As they age, they develop a silver-grey patina, though they can be oiled to maintain their original color.
- Summary: Ideal for a premium look and long-term durability, hardwoods are a pricier option but can provide excellent value and longevity with minimal maintenance.
Composite Decking
- Overview: Composite decking, typically made from a blend of wood fibers and recycled plastic, is an increasingly popular choice in New Zealand for its low maintenance and long lifespan.
- Durability: Composite boards are highly resistant to rot, moisture, and insects, and they don’t warp or crack like natural wood. Many composite decks are UV-stabilized, which helps them retain their color even in sunny conditions.
- Cost: Composite decking has a higher upfront cost compared to pine and is similar to or slightly lower than premium hardwoods. However, the lack of ongoing maintenance expenses can balance out the initial investment.
- Aesthetics: Composite boards now come in a range of colors and textures, some of which mimic natural wood, offering a consistent look without visible knots or grain.
- Summary: Composite decking is perfect for those seeking durability and minimal maintenance, though the lack of natural timber texture can be a drawback for some.
Weather Considerations for NZ Decking
New Zealand’s climate varies considerably, from the humid, rainy conditions of the West Coast to the strong UV exposure in the northern regions. Coastal areas bring added challenges with salt and wind exposure. Selecting materials that suit your region’s climate is essential.
- UV Exposure: Northern NZ experiences intense sunlight, which can cause some materials to fade or warp. Hardwoods and UV-stabilized composite decking tend to fare well in these areas.
- Rain and Humidity: For areas prone to heavy rainfall or humidity, pressure-treated pine and composite decking both perform well, resisting moisture damage. Hardwood’s natural oils also make it resistant to moisture, though it’s best to ensure proper installation and sealing.
- Coastal Conditions: Salt air can accelerate corrosion and decay. Composite decking and certain hardwoods are ideal for these environments due to their natural and engineered resistance to salty air. Properly treated pine can also work but may need more frequent maintenance.
Eco-Friendly Decking Choices for Sustainable Living
Sustainability is a significant consideration for many Kiwis today. Fortunately, decking options are available that reduce environmental impact without compromising quality.
- FSC-Certified Wood: Many hardwoods and pine options in NZ come with FSC (Forest Stewardship Council) certification, ensuring the wood has been sourced sustainably. Opting for FSC-certified materials supports responsible forestry practices.
- Composite Decking from Recycled Materials: Composite decking brands that use recycled plastic and wood fibers offer an eco-friendly alternative by reducing waste and demand for new raw materials. Since composite decks have a longer lifespan, they also reduce the need for frequent replacement.
- Locally Sourced Materials: Whenever possible, selecting decking sourced from local timber can reduce the environmental impact of transportation and support the New Zealand economy.
By understanding the strengths and weaknesses of each decking material in relation to cost, durability, and aesthetics, and by taking into account New Zealand’s diverse climate and growing interest in sustainable options, you can make an informed choice that fits your needs and values. A well-chosen deck can enhance your outdoor living space and withstand NZ’s weather conditions beautifully for years to come.

Tools And Materials You’ll Need For Your DIY Project
Before diving into any DIY project, it’s crucial to have the right tools and materials ready. Whether you’re building a deck, a fence, or something else entirely, having the proper equipment ensures the job is done safely, efficiently, and to a high standard. Below is a breakdown of the essential tools, fasteners, and safety gear you’ll need, with a focus on what’s appropriate for New Zealand’s unique environmental conditions.
Essential Tools
To successfully complete your project, there are a few key tools that are must-haves. Each plays a crucial role in making sure your structure is both precise and durable.
- Saws: Whether you’re using a hand saw, circular saw, or mitre saw, these tools are essential for cutting wood or other materials to size. For larger cuts, a circular saw provides efficiency, while a hand saw offers more control for smaller or more detailed cuts.
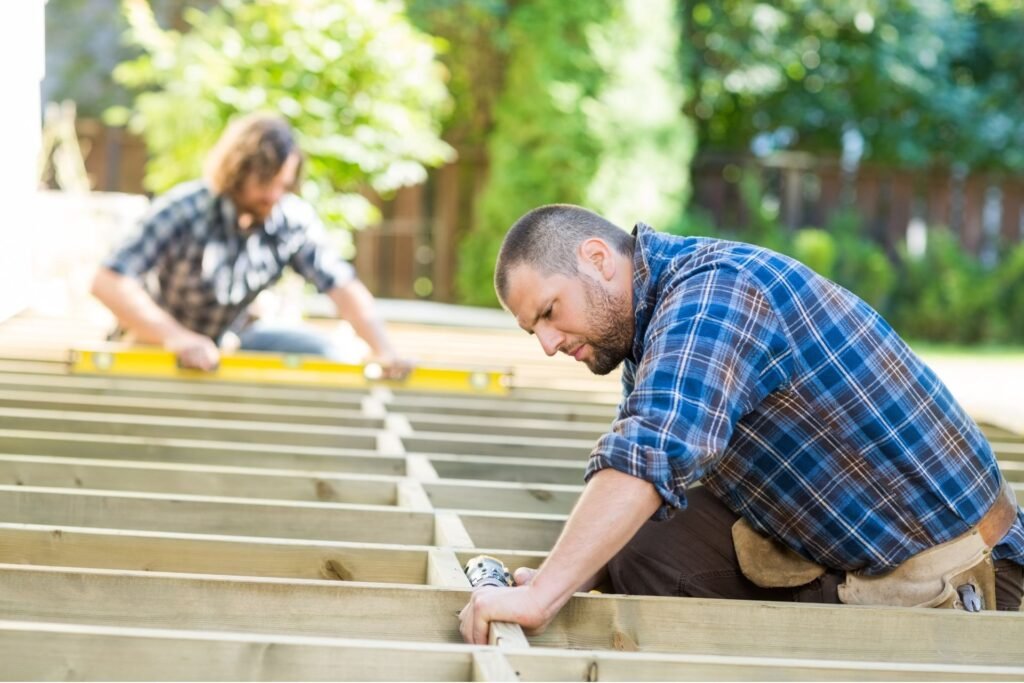
- Levels: Ensuring your structure is level is critical for both safety and aesthetics. A spirit level (also called a bubble level) will help you make sure every surface, whether vertical or horizontal, is perfectly aligned. This is particularly important when building structures like decks, where even slight misalignments can cause problems down the line.
- Drills: A drill is another indispensable tool, perfect for creating holes and driving screws into various materials. Consider using a cordless drill for added flexibility around the workspace. Attachments like screwdriver bits and hole saws can turn a simple drill into a multifunctional tool, saving you time and effort.
- Measuring Tape: Precision is key in any construction project. A sturdy measuring tape ensures your materials are cut to the correct size and that your project aligns with your design plan. Always measure twice to avoid costly mistakes.
- Clamps: Clamps are essential for holding materials together temporarily while you work, ensuring accuracy and ease when assembling parts. They also help prevent shifting or movement during the drying or setting process.
- Hammer: A good-quality hammer is necessary for tasks like driving nails into wood, adjusting parts, or even dismantling existing structures when needed. Choose a hammer with a comfortable grip and the right weight for you to minimize fatigue during longer tasks.
Fasteners and Brackets
Choosing the right fasteners is especially important when building in New Zealand due to its diverse and sometimes harsh environmental conditions. From high humidity to salty coastal air, materials are more prone to rust and wear over time if the wrong type of fasteners are used.
- Galvanized Nails and Screws: In New Zealand, it’s recommended to use fasteners that are galvanized, meaning they’ve been coated in zinc to resist rust and corrosion. This is crucial for outdoor projects exposed to moisture, such as decks or fences. Galvanized nails and screws provide the longevity and durability you need, ensuring your project withstands the test of time.
- NZ-Standard Fasteners: Always opt for fasteners that meet New Zealand building standards. These are specifically designed to handle the country’s unique environmental challenges. For example, in coastal areas or regions with high rainfall, stainless steel fasteners might be required for extra durability against corrosion.
- Brackets and Joist Hangers: When working on structural projects like decks or pergolas, you’ll need brackets and joist hangers to reinforce joints and connections. These metal pieces provide extra stability, ensuring the structure can bear weight and resist movement. Look for corrosion-resistant materials, such as stainless steel or galvanized steel, which can handle New Zealand’s conditions without deteriorating.
Safety Gear
Safety is paramount in any construction project, no matter the size. Even small DIY tasks can pose risks if you don’t take the proper precautions. Here’s a rundown of the essential safety gear you should always use.
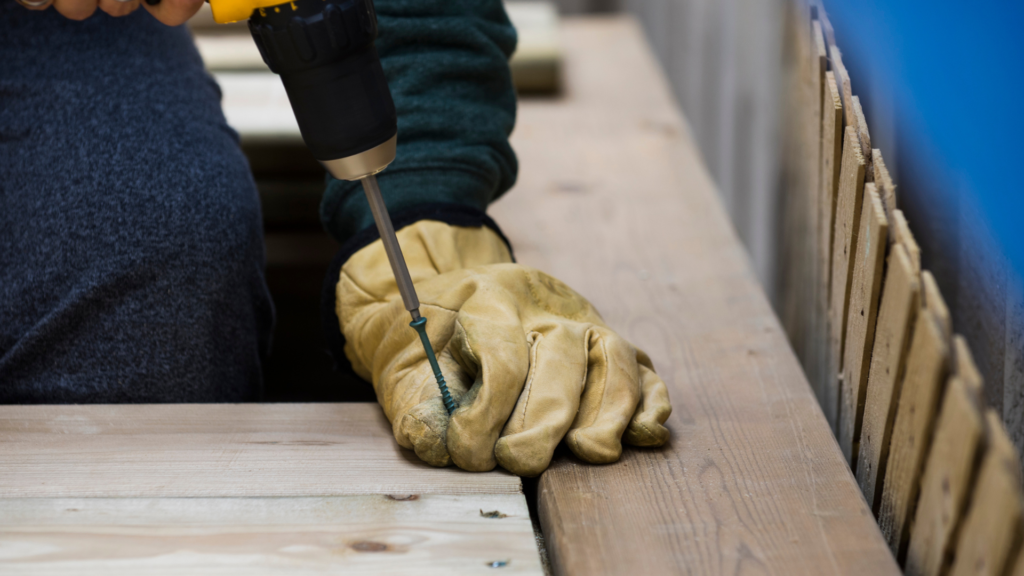
- Gloves: Work gloves protect your hands from cuts, splinters, and burns, which are common when handling wood, metal, or power tools. Choose gloves that offer a good balance of dexterity and protection, so you can handle materials and tools without sacrificing control.
- Goggles or Safety Glasses: Eye protection is a must, especially when cutting, drilling, or hammering. Safety goggles shield your eyes from flying debris, dust, and sharp fragments. Even a small piece of wood or metal can cause serious injury, so never skip this step.
- Ear Protection: Power tools like saws and drills can reach dangerous noise levels, leading to potential hearing damage if used over extended periods. Use earmuffs or earplugs to reduce exposure to these high decibel levels and protect your hearing in the long run.
- Dust Masks or Respirators: When cutting or sanding materials, particularly treated wood or substances like plasterboard, fine particles can be harmful if inhaled. A dust mask or respirator ensures that you’re not breathing in hazardous dust or chemicals, keeping your lungs safe during the project.
By preparing all the necessary tools and materials ahead of time, as well as prioritizing safety, you’ll set yourself up for success. Each tool, fastener, and safety item plays a crucial role in ensuring your DIY project is completed smoothly, accurately, and without unnecessary risk. When you invest in quality materials and follow proper safety protocols, you’ll not only achieve a great result but also enjoy the process with confidence.
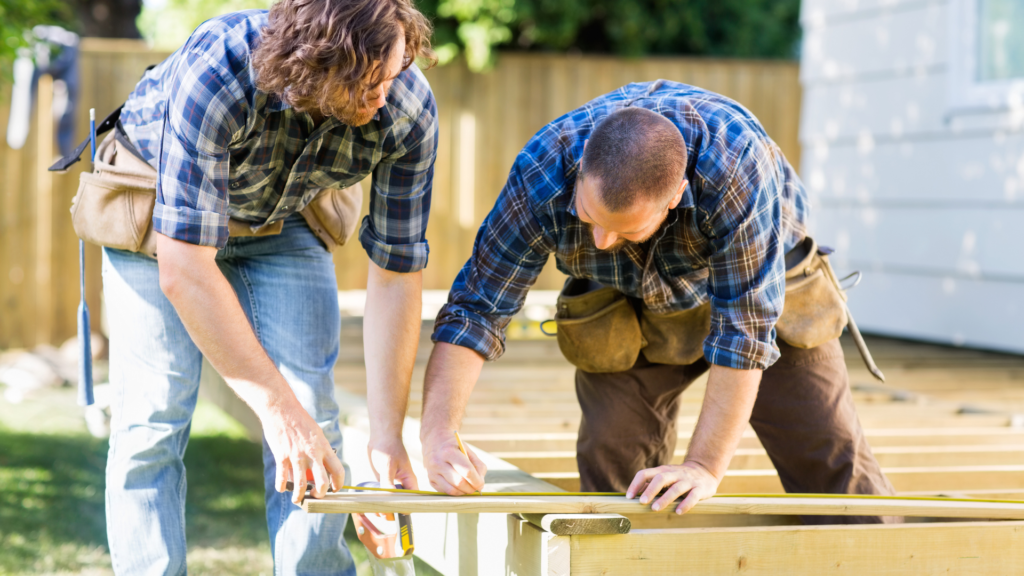
Obtaining Necessary Permits And Approvals For Building A Deck In New Zealand
When planning to build a deck in New Zealand, obtaining the right permits and approvals is crucial to avoid potential legal or safety issues. Whether you’re adding a small patio or constructing a large deck, understanding the New Zealand building consent requirements will ensure your project is compliant and safe. Let’s dive into the key aspects you need to consider: council consent and insurance.
Council Consent Requirements
In New Zealand, not all decks require council approval. However, there are specific criteria that determine whether or not you need to apply for building consent. According to the Building Act 2004, you will need to apply for consent if your deck meets any of the following conditions.
- Height: If your deck is over 1.5 meters above the ground, you will need to obtain building consent. This is because decks at this height pose a greater risk of injury in case of a fall, so stricter safety standards are applied.
- Attached to a building: If your deck is attached to a building, especially in a way that may impact its structure, council approval is often necessary.
- Near boundaries: If the deck is constructed close to a boundary or in a location where it could impact neighbors or public spaces, a consent may be required.
- Decks near water: If you’re building a deck near a body of water, such as a pool, stream, or ocean, you may need to check for additional regulations, as these areas often have more stringent building codes.
To apply for building consent, follow these steps.
- Gather the necessary documents: You’ll need detailed plans of the deck, including structural details and materials to be used. Make sure these plans meet the New Zealand Building Code standards.
- Submit your application: Lodge your consent application with your local council. This can often be done online, or you can visit your local council office.
- Wait for approval: The council will assess your application to ensure the proposed deck meets safety and construction standards. The approval process can take anywhere from a few days to a few weeks, depending on the complexity of the project and the council’s workload.
- Inspections: Once your consent is approved and construction begins, your deck may require one or more inspections by the council to ensure compliance with the approved plans.
It’s important to follow these guidelines carefully, as building without the necessary consent could lead to fines, forced removal of the structure, or complications when selling your property.
Insurance Considerations
When building a deck, especially if it’s elevated or close to water, it’s vital to check with your home insurance provider before beginning construction. Here’s why.
- Insurance coverage during construction: Some insurance providers may require you to inform them before starting construction on a deck, especially if it changes the structure of your home or increases its value. Failing to notify your insurer could result in your policy not covering damages related to the deck during construction.
- Post-construction coverage: Once the deck is built, you’ll want to make sure it’s included in your home insurance policy. Decks, especially if they are large, elevated, or near water, can add to the value of your property and also present additional risks. For instance, if your deck collapses or someone is injured on it, having the proper insurance coverage can protect you from potential financial loss.
- High-risk areas: If you’re building a deck in a high-risk area, such as a flood-prone zone or a coastal property, additional coverage may be required. Your insurer might also need to adjust your premium based on the increased risk associated with the deck.
Building a deck is a great way to enhance your outdoor space, but it comes with important responsibilities. Obtaining the necessary council consents and ensuring your insurance covers the new addition to your home are both essential steps in the process. This will not only ensure compliance with local regulations but also protect your investment in the long run.

Step-By-Step Guide To Building Your Deck
Building a deck is a fantastic way to enhance your outdoor living space, offering both function and beauty. Whether you’re a DIY enthusiast or someone considering tackling a construction project for the first time, this step-by-step guide will help you create a solid, safe, and stylish deck. We’ll walk through the entire process, from preparing the site to the final finishing touches. This guide is tailored for New Zealand conditions, taking into account weather changes and specific building standards.
Preparing the Site
Clearing and Leveling the Ground
Before you begin constructing your deck, it’s essential to properly prepare the area. Start by clearing the site of any vegetation, rocks, or debris. Grass, shrubs, and any plants must be removed to create a flat, solid base. You can use a spade to dig out these elements and ensure the ground is level. If the area is sloped, you may need to fill low spots or excavate high points.
Marking Out the Deck’s Footprint
Once the area is clear, the next step is to mark the boundaries of your deck. Use stakes at each corner and connect them with string lines to define the deck’s layout. This will help you visualize the final structure and ensure your dimensions are accurate. Be sure to check for right angles using a simple 3-4-5 triangle rule to keep everything aligned.
Laying the Foundations
Post Holes and Footings
Strong foundations are critical to building a durable deck. Begin by digging post holes at the marked points where your support posts will stand. Each hole should be dug to a depth that suits your deck’s height and local building regulations, generally around 600mm to 900mm deep for stability. Pour concrete into the holes to form footings, allowing the concrete to fully cure before moving forward.
New Zealand-Specific Building Standards
In New Zealand, building codes are particularly stringent in earthquake-prone regions. When laying foundations, it’s essential to comply with NZ-specific standards (such as NZS 3604) to ensure your deck can withstand seismic activity. Check with your local council for any additional requirements that may apply to your location.
Installing the Frame
Laying the Bearers
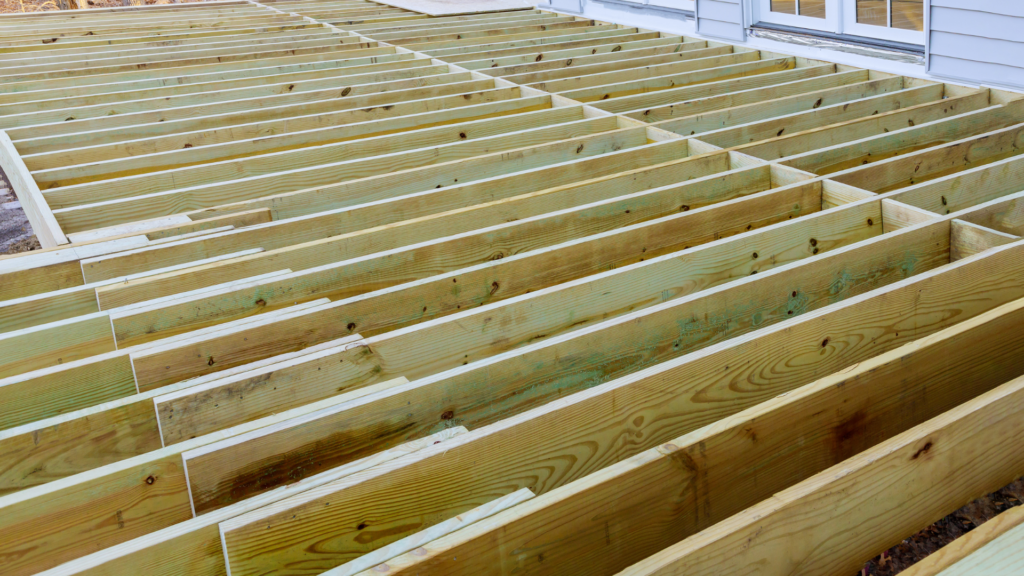
Bearers are horizontal beams that support the overall structure of your deck. Position them across the footings, ensuring they are level and securely anchored. You may need to use adjustable post brackets to make slight adjustments to the height and alignment.
Attaching the Joists
Once the bearers are in place, it’s time to install the joists, which are the boards that sit perpendicular to the bearers and provide the main support for your decking boards. Attach the joists using galvanized nails or joist hangers, making sure to space them evenly—typically 400mm to 600mm apart. Even spacing is crucial for ensuring weight is distributed evenly across the deck.
Checking for Level
After securing the joists, use a spirit level to double-check that everything is perfectly horizontal. This step ensures that the deck surface will be even and stable, preventing issues like pooling water or uneven decking boards later on.
Laying the Decking Boards
Choosing the Right Spacing
When laying decking boards, it’s important to leave small gaps between them to allow for drainage and natural expansion or contraction due to weather changes. In New Zealand’s fluctuating climate, spacing of around 3-5mm between boards is typically recommended. This prevents warping and ensures water doesn’t pool on the surface.
Fixing Boards Securely
Use appropriate screws, nails, or hidden fasteners to attach the decking boards to the joists. Stainless steel or galvanized screws are ideal for New Zealand’s coastal areas, where rust can be a concern. Fasten the boards securely to prevent any movement or squeaking when walked on. Start at one end and work your way across the deck, keeping the spacing consistent as you go.
Building Railings and Stairs (If Required)
New Zealand Safety Requirements
If your deck is elevated more than 1 meter above the ground, New Zealand building codes require the installation of railings for safety. The height and design of these railings must comply with the Building Code to prevent falls. Ensure that the railing posts are securely attached to the deck’s frame and that the handrail height is between 900mm to 1100mm from the deck surface.
Constructing Sturdy Stairs
If your deck requires stairs, they need to be both functional and safe. The rise (height of each step) and run (depth of each step) should be calculated carefully to ensure comfort and safety. For standard decks, a rise of 150mm to 180mm and a run of 250mm to 300mm is common. Be sure to anchor the stair stringers securely to the deck frame and ground for stability.
Finishing Touches
Sanding and Sealing the Deck
After the decking boards are installed, sand any rough edges or splinters to create a smooth, even surface. This step not only improves the aesthetics but also prevents accidents like splinters. Once sanded, applying a sealant or deck stain is crucial to protect the wood from New Zealand’s varied weather conditions. A quality sealant will guard against moisture, UV damage, and general wear and tear.
Adding Decorative Elements
To make your deck truly your own, consider adding personal touches. Built-in seating, planter boxes, or outdoor lighting can elevate the space’s functionality and style. These features not only add to the visual appeal but also increase the usability of your deck, whether it’s for hosting gatherings or enjoying quiet outdoor moments.
By following this step-by-step guide, you can build a safe, durable, and stylish deck that complies with New Zealand’s building regulations. From the foundational work to the final decorative details, each phase is designed to ensure your deck is both structurally sound and visually appealing, offering years of enjoyment.

Deck Maintenance And Care Tips
Maintaining your deck is essential to preserve its appearance, ensure safety, and extend its life, especially in New Zealand’s unique climate. Whether your home is in a damp inland area or a coastal region, regular upkeep can help prevent common issues like mold, mildew, and moisture damage. Here are some practical tips for keeping your deck in excellent condition all year round.
Protect Your Deck from New Zealand’s Moisture
New Zealand’s climate, with its wet and humid conditions, makes regular deck cleaning a top priority. To prevent mold, mildew, and rot from setting in, it’s essential to clean your deck at least once a season.
How to clean your deck
- Sweep away debris: Leaves, dirt, and moisture can create the perfect environment for mold to grow. Start by sweeping your deck thoroughly to remove any organic material that can trap moisture.
- Wash with a deck cleaner: Use a gentle deck cleaner to scrub the surface. A soft-bristle brush works well to remove grime without damaging the wood. If your deck is particularly dirty or has stubborn stains, a pressure washer on a low setting can help.
- Rinse thoroughly: After scrubbing, make sure to rinse the deck well with water. Leaving any soap residue can lead to discoloration or surface damage over time.
- Dry completely: After cleaning, let your deck dry out completely before using it or applying any sealant. In New Zealand’s damp regions, you may need to plan your cleaning on a warm, dry day to ensure the wood dries out properly.
Routine cleaning is especially crucial if your deck is exposed to sea spray, as coastal air can accelerate wear and tear through salt and moisture.
Resealing and Staining
In New Zealand’s harsh weather conditions, resealing and staining your deck regularly is key to maintaining both its appearance and longevity. The frequency with which you should treat your deck depends on the type of wood and the exposure to elements, but a good rule of thumb is to reseal or stain your deck every 1-3 years.
Why resealing and staining is important
- Protection from moisture: Sealants create a barrier that prevents water from soaking into the wood. This is especially important in New Zealand’s wet and coastal regions where excessive moisture can cause wood to warp, crack, or rot.
- Preserving color: Staining helps preserve the natural color of the wood while protecting it from UV damage. New Zealand’s sun can be harsh, and without proper staining, your deck can quickly fade and become brittle.
- Preventing mold and mildew: Stains and sealants with mold inhibitors help protect your deck from the inevitable buildup of mold and mildew in humid areas.
How to reseal and stain your deck
- Clean and prep the deck: Before applying any new treatment, make sure your deck is clean and dry.
- Choose the right product: Select a high-quality deck sealant or stain that is appropriate for the type of wood and the level of exposure your deck experiences. For coastal areas, choose a product designed for heavy moisture resistance.
- Apply evenly: Use a brush, roller, or sprayer to apply the sealant or stain evenly across the deck, paying extra attention to the ends of the boards where moisture can seep in.
- Allow time to dry: Just like with cleaning, make sure the weather is cooperative. Drying times can vary, but generally, allow at least 24-48 hours before walking on the deck or placing furniture back.
Addressing Issues Before They Escalate
Your deck undergoes daily wear and tear, from foot traffic to exposure to the elements. It’s crucial to inspect it annually to catch any signs of damage early on. Fixing minor issues as soon as they appear can prevent bigger, more expensive repairs later.
What to inspect
- Loose fasteners: Over time, screws and nails can loosen, leading to unstable boards. Check for any fasteners that need tightening or replacing.
- Warping or cracked boards: Wood exposed to moisture can warp or crack. Walk across your deck and feel for any soft spots or visible cracks that could indicate deeper damage.
- Rot and decay: Pay special attention to areas that are shaded or prone to staying wet, as these are the most likely spots for rot and decay to start.
- Handrails and steps: Safety is paramount, so inspect handrails, steps, and balusters for any signs of wear or instability. If anything feels loose or wobbly, it’s important to repair it immediately.
Addressing wear and tear
- Replace any damaged boards promptly to avoid further structural issues.
- Tighten or replace loose fasteners as needed.
- If you spot any early signs of rot, act quickly to remove and replace the affected wood.
By following these maintenance tips, routine cleaning, timely resealing and staining, and regular inspections you’ll not only keep your deck looking beautiful but also ensure that it lasts for many years to come, despite the challenges posed by New Zealand’s diverse climate. Proper deck care is a worthwhile investment that enhances both the value and enjoyment of your outdoor living space.
Common Mistakes To Avoid When Building A Deck
Building a deck can transform your outdoor space, but it’s crucial to avoid common pitfalls to ensure your project is safe, durable, and up to code. Here are some frequent mistakes homeowners make when building a deck and tips on how to avoid them.
Improper Leveling
One of the most fundamental steps in building a deck is ensuring the foundation is level. An uneven foundation can cause a range of problems, from structural instability to aesthetic issues. If the deck isn’t level, it may experience premature wear and tear, such as uneven pressure distribution that leads to sagging or warping. Over time, this can result in expensive repairs or, in worst-case scenarios, complete deck failure.
To avoid this mistake, always take the time to properly measure and level the ground before laying the foundation. This includes checking for slopes or dips in the area where the deck will sit. Using a laser level or another reliable leveling tool can make this process easier and more accurate. A solid, level foundation ensures your deck will last for years, providing a safe and stable structure for you and your family to enjoy.
Using the Wrong Fasteners
Another common mistake when building a deck is using incorrect or low-quality fasteners. Fasteners are the nails, screws, and bolts that hold your deck together. Choosing the wrong type, especially in harsh environments like coastal areas of New Zealand, can lead to corrosion and eventual deck failure. In coastal regions, where salty air can accelerate rust and deterioration, it’s essential to use corrosion-resistant fasteners, such as stainless steel or hot-dipped galvanized screws.
Failing to use the correct fasteners can result in a weakened structure, making your deck unsafe over time. Not only will corroded fasteners compromise the deck’s integrity, but replacing them can be costly and time-consuming. Make sure to select fasteners that are rated for outdoor use and compatible with the type of wood or materials you’re using. In doing so, you’ll extend the life of your deck and ensure it remains secure.
Skipping Permits
One of the most easily avoidable yet frequent mistakes is skipping the necessary permits when building a deck. In many areas, including New Zealand, building a deck requires local council approval. Skipping this step can lead to significant legal and safety problems. For one, if your deck isn’t built to code, you may be forced to make costly changes or even tear it down completely. Worse, an unsafe deck could pose serious risks to anyone who uses it.
Obtaining the proper permits ensures that your deck complies with local building regulations, including structural safety standards and zoning laws. The consent process may seem time-consuming, but it’s essential to protect your investment and ensure the safety of your family and guests. Moreover, if you ever decide to sell your home, having a properly permitted deck can add value, whereas an unpermitted deck could cause complications during the sale process.
By avoiding these common mistakes, ensuring proper leveling, using the right fasteners, and securing the necessary permits you can create a sturdy, safe, and long-lasting deck that enhances your outdoor space for years to come.
Hiring A Professional Vs. DIY
When planning to build a deck, one of the most crucial decisions you’ll face is whether to tackle the project yourself or hire a professional. Both options come with their own set of pros and cons, and the choice often depends on factors like your budget, skill level, and time constraints. Here’s a detailed look at both sides to help you make an informed decision.
DIY Deck Building
Building your own deck can be a rewarding experience, but it’s essential to understand what’s involved before diving in.
Pros of DIY Deck Building
- Cost Savings: One of the main reasons homeowners opt for a DIY deck build is the potential to save money. Labor costs can make up a significant portion of a deck building project, so by doing the work yourself, you can cut down on overall expenses.
- Sense of Accomplishment: There’s something deeply satisfying about completing a home improvement project with your own hands. Building a deck yourself allows you to take pride in your craftsmanship and enjoy a space that you created from start to finish.
- Creative Control: When you’re in charge of the project, you have full control over every design decision. Whether it’s the size, layout, materials, or finish, you get to tailor the deck to your exact preferences without negotiating with a contractor.
Cons of DIY Deck Building
- Time Commitment: A DIY deck project can be time-consuming. Depending on the size and complexity, it could take several weekends or even months to complete. If you have a busy schedule, this might not be ideal.
- Skill Level: While basic carpentry skills are helpful, building a deck requires more advanced knowledge, including structural design, safety regulations, and precise measurements. Mistakes can be costly and time-consuming to fix, and in some cases, they may compromise the safety of the deck.
- Access to Tools and Materials: Deck construction requires specific tools and high-quality materials, which can be expensive to purchase or rent. If you don’t already own the necessary equipment, the cost could add up quickly.
- Permits and Regulations: Depending on where you live in New Zealand, you may need a building permit to construct a deck. Navigating local building codes and regulations can be tricky, especially if you’re unfamiliar with them. Failing to comply could lead to fines or having to redo parts of the deck.
When Should You Hire a Professional Deck Builder
If the idea of building a deck yourself seems overwhelming or if you want to ensure top-notch quality and safety, hiring a professional deck builder might be the better choice. Here are some situations where hiring a professional makes sense.
Complex Deck Designs
If you’re planning a complex or large-scale deck with multi-levels, built-in features like seating or lighting, or custom materials, it’s often best to leave it to the experts. A professional deck builder will have the experience and knowledge needed to execute intricate designs and ensure the structure is sound.
Time Constraints
For homeowners who don’t have the time to dedicate to a DIY project, hiring a professional can help get the job done more efficiently. Professionals typically work within set timelines and can complete the project in a fraction of the time it would take a DIYer.
Guaranteed Workmanship
When you hire a professional, especially a licensed and experienced contractor, you’re paying for peace of mind. Most reputable builders in New Zealand offer warranties on their work, meaning that if something goes wrong, they’ll fix it. You’ll also have the assurance that the deck is built to code and complies with all safety regulations.
Access to Quality Materials
Professional deck builders often have established relationships with suppliers, giving them access to high-quality materials at better prices than what’s available to the general public. They also know which materials are best suited to your local climate and environment, ensuring your deck will be durable and long-lasting.
Tips for Hiring a Reliable Deck Builder in New Zealand
If you’ve decided that hiring a professional is the right choice for your deck project, here are a few tips to help you find a trustworthy and skilled contractor.
- Look for Licensed Builders: In New Zealand, it’s crucial to hire a licensed builder. Licensed practitioners have undergone formal training and meet strict competency standards. You can check if a builder is licensed through the New Zealand Government’s Licensed Building Practitioners (LBP) Register.
- Check for Reviews and References: Before hiring, look for reviews or ask the contractor for references from previous clients. A reputable builder should have a history of satisfied customers who are willing to vouch for their work.
- Get Multiple Quotes: To ensure you’re getting a fair deal, it’s a good idea to get at least three quotes from different builders. This will give you a sense of the market rate and help you avoid any inflated pricing.
- Ask About Warranties: Find out if the builder offers a warranty on their work. A good builder will stand by their craftsmanship and provide some form of guarantee for a specific period after the job is done.
- Confirm Insurance: Ensure the contractor has the appropriate insurance coverage, including public liability insurance. This will protect you in case of any accidents or damage during the construction process.
DIY or Professional
Ultimately, whether to go the DIY route or hire a professional depends on your personal situation. If you have the time, skills, and enthusiasm to take on the project, a DIY deck can be a rewarding challenge. However, if you prefer to ensure the job is done quickly, safely, and to a high standard, hiring a professional deck builder is likely the better option. In either case, planning is key. Make sure you have a clear idea of the design, materials, and budget before starting, and always consider the long-term value and durability of the deck you’re creating. Whether you do it yourself or bring in the experts, the end goal is the same: a beautiful, functional outdoor space that enhances your home and lifestyle.
FAQs: About How To Build A Deck NZ
Do I need building consent to build a deck in New Zealand?
In New Zealand, you generally do not need building consent if your deck is under 1.5 meters high. However, if the deck is higher than this or involves complex structures (like balustrades, stairs, or is attached to the house), you’ll need to apply for consent through your local council. Always check with your local council to be sure you’re compliant with the regulations.
What is the best wood to use for a deck in New Zealand’s climate?
Pine (pressure-treated) is the most commonly used wood for decking in New Zealand due to its affordability and durability. For higher-end options, hardwoods like Kwila or Vitex are popular because they are naturally resistant to decay and weathering. Composite decking is also a good choice, as it resists moisture and UV damage, making it ideal for coastal regions.
How long does it take to build a deck?
The time required to build a deck depends on its size and complexity. A simple, ground-level deck might take a skilled DIYer a few weekends to complete, while larger or elevated decks with stairs and railings could take several weeks, especially if weather or permits are factors. If hiring a professional, timelines can be faster but also depend on the contractor’s availability.
What tools do I need to build a deck?
Essential tools include a circular saw, drill, level, tape measure, posthole digger, and a hammer. You’ll also need safety gear like goggles, gloves, and hearing protection. If you plan to build a more complex deck with features like stairs or railings, you may need additional specialized tools.
How much does it cost to build a deck in NZ?
The cost of building a deck in New Zealand can vary greatly depending on the size, materials used, and whether you do it yourself or hire a professional. On average, a basic wooden deck can cost between $300 and $500 per square meter. If you’re using hardwood or composite materials, or if the deck design is more complex, the price may go higher. Remember to factor in additional costs for permits, staining, and future maintenance.
How do I maintain my deck in New Zealand’s weather?
Regular maintenance is essential for extending the life of your deck, especially given New Zealand’s varied weather conditions. Clean your deck annually to remove dirt, moss, and mildew. If you have a wooden deck, reapply stain or sealant every 2-3 years to protect it from UV rays and moisture. Inspect the deck regularly for any loose fasteners, warped boards, or signs of rot.
Can I build a deck myself, or should I hire a professional?
Whether you should DIY or hire a professional depends on your skill level and the complexity of the project. If the deck is straightforward and you’re confident with tools and planning, DIY can save money. However, for elevated decks or those requiring building consent, it’s often safer and quicker to hire a professional. They’ll ensure the deck meets all legal and structural requirements.
What are common mistakes to avoid when building a deck?
Some common mistakes include not leveling the foundation properly, using incorrect or non-treated fasteners (which can rust and weaken over time), skipping council permits, and not accounting for drainage between boards. Also, rushing the build without proper planning can lead to structural issues down the line, so take your time and double-check measurements and regulations.
How high can I build a deck before needing a balustrade or railing?
In New Zealand, if your deck is higher than 1 meter above the ground, you are required to install a balustrade or railing for safety. The balustrade must comply with NZ building codes, ensuring it is sturdy and meets height regulations. It’s best to consult with your local council to confirm specific requirements.
Do decks in New Zealand need to be earthquake-proof?
While decks are not typically required to be “earthquake-proof,” they must meet the structural standards set out in New Zealand’s building codes. This includes ensuring that the deck’s foundation is strong and stable, especially in regions prone to seismic activity. Postholes should be deep enough and filled with concrete to provide a stable foundation. Elevated decks may require additional bracing or support for extra safety in an earthquake.
Conclusion
Building a deck in New Zealand can be a rewarding project that transforms your outdoor space, and it all starts with careful planning and attention to detail. From the initial stages of deciding where your deck will be located and understanding your site’s specific requirements to selecting high-quality materials like treated timber, you need to ensure that every choice contributes to the durability and functionality of your new deck. An essential part of the process is adhering to local building regulations, including getting the necessary permits and ensuring the deck design meets the New Zealand Building Code for safety and structural integrity. While it may seem daunting, with the right tools, a clear plan, and some DIY enthusiasm, creating a beautiful and functional deck is entirely achievable for most homeowners. For those less confident or unsure about certain steps, consulting a professional can provide peace of mind and ensure everything is done to the highest standard. Whether you’re ready to roll up your sleeves and get started or prefer to enlist expert help, now is the perfect time to bring your dream deck to life and enhance your outdoor living space.
About the Author:
Mike Veail is a recognized digital marketing expert with over 6 years of experience in helping tradespeople and small businesses thrive online. A former quantity surveyor, Mike combines deep industry knowledge with hands-on expertise in SEO and Google Ads. His marketing strategies are tailored to the specific needs of the trades sector, helping businesses increase visibility and generate more leads through proven, ethical methods.
Mike has successfully partnered with numerous companies, establishing a track record of delivering measurable results. His work has been featured across various platforms that showcase his expertise in lead generation and online marketing for the trades sector.
Learn more about Mike's experience and services at https://theleadguy.online or follow him on social media:

