Welcome to your complete guide on how to remove paint from a deck in New Zealand! Whether your deck’s paint is peeling, faded, or you’re just ready for a fresh new look, removing old paint is an essential first step to restoring your outdoor space. With New Zealand’s unique climate – from harsh UV rays to frequent rain – decks can suffer from paint degradation faster than you might expect, leaving your beautiful outdoor area looking worn and weathered. In this guide, we’ll walk you through the most effective methods to remove paint safely, provide tips on using eco-friendly products, and share practical advice to ensure your deck is ready for a stunning transformation. Whether you’re a seasoned DIYer or a first-timer, this guide is designed to help you navigate every step with ease.
To remove paint from a deck in New Zealand, start by preparing the area by clearing debris and covering nearby plants. Use a paint scraper or wire brush to manually remove loose paint. For tougher spots, apply an eco-friendly paint remover and follow the manufacturer’s instructions. After the paint softens, scrape it off and use a power washer to clean the surface. Finally, sand the deck to smooth it and prepare for repainting or staining. Be mindful of NZ’s environmental guidelines for proper disposal of chemicals and paint.
Table of Contents
Assessing Your Deck: Should You Remove Paint Or Repaint Over It?
When it comes to maintaining your deck, one of the most critical decisions is whether to remove the old paint or simply repaint over it. This decision depends on a variety of factors, including the current condition of the deck, the local climate, and the type of damage the paint has sustained. Below is a step-by-step guide to help you assess your deck and make the best choice for long-term durability and aesthetics.
Inspect Your Deck
The first step is to carefully inspect your deck to determine whether the paint requires removal. There are a few key indicators that can help you figure this out:
- Bubbling Paint: If you notice bubbles in the paint, it usually means moisture has gotten trapped underneath. This is a sign that the paint isn’t adhering properly to the wood, and a full paint removal may be necessary before applying a fresh coat.
- Peeling Paint: Large areas where the paint is flaking or peeling off indicate poor adhesion, often caused by weather exposure or improper application. In such cases, sanding or using a paint stripper to remove the old paint will give the new layer a clean surface to adhere to.
- Extensive Wear: If you see large portions of the deck where the paint has worn off down to the bare wood, this is another sign that paint removal is likely needed. Repainting over such worn spots can lead to uneven coverage and premature paint failure.
However, not every issue calls for a complete removal. Minor signs of wear, such as small chips or scratches, may only require a touch-up or light sanding before you repaint.
NZ-Specific Factors to Consider
In New Zealand, the weather can be harsh on outdoor surfaces like decks, especially with the combination of high UV exposure, frequent rainfall, and fluctuating humidity levels. These factors make it even more important to assess your deck’s condition accurately before repainting or removing paint.
- Rain and Humidity: In areas that experience high rainfall and humidity, water can seep into the wood and under the paint, leading to bubbling or mold growth. If you see black spots or other signs of moisture damage, removal of the paint is likely the better option to prevent further damage and allow the wood to dry and breathe.
- UV Exposure: UV rays from the sun can cause the paint to fade, crack, or blister. If your deck is exposed to the sun most of the day, you’ll want to pay close attention to signs of wear caused by UV damage. Faded paint alone might not warrant removal, but if cracking and blistering are present, it’s a sign that you need to strip the paint before applying a fresh coat.
- Salt and Coastal Exposure: In coastal areas, salt can also accelerate paint deterioration. If your deck is near the sea, look for white, powdery deposits (salt efflorescence) on the surface of the paint. This could indicate that salt has penetrated the wood, and in such cases, a full removal might be required to prevent ongoing issues.
When Not to Remove Paint
There are cases where paint removal may not be necessary, and a simple repaint could be the better option:
- Minor Chips or Scratches: Small imperfections like light chips, scratches, or areas where the paint has slightly faded can usually be remedied by sanding down the affected spots and applying a fresh coat of paint. These minor issues don’t require stripping the entire deck.
- Good Adhesion with Cosmetic Damage: If the paint is still adhering well to the wood overall and there are no signs of moisture damage, widespread peeling, or bubbling, a fresh layer of paint applied over the existing coat might be all that’s needed. Light sanding can help the new paint adhere more effectively to the old paint.
When Complete Removal is Essential
There are situations where repainting over old paint isn’t enough, and full removal is essential for long-lasting results:
- Widespread Peeling or Flaking: When large areas of the paint are peeling, flaking, or blistering, repainting over it will only mask the problem temporarily. The new paint won’t adhere properly, and the deck will continue to deteriorate beneath the surface.
- Mold or Mildew Growth: If mold or mildew has started to grow on the deck, it’s crucial to remove the paint entirely. Mold can seep into the wood, causing long-term structural damage and health risks. Thorough cleaning and removal of the affected paint will allow you to treat the wood and start fresh with a clean, protective layer of paint.
In conclusion, assessing whether to repaint or remove the paint from your deck depends largely on the condition of the existing paint and the specific environmental factors in New Zealand. If there are significant issues like peeling, bubbling, or mold, removing the paint is the best way to ensure a long-lasting, smooth finish. However, for minor wear and tear, a simple repaint could be sufficient to restore the deck’s appearance and protect it from further damage. Always take the time to properly inspect your deck before making a decision, as this will save time, effort, and costs in the long run.

Tools & Materials Needed
To successfully remove deck paint, it’s crucial to have the right tools and materials on hand. This ensures that the job is done efficiently, effectively, and in an eco-friendly manner, which is important, particularly in New Zealand’s environmentally conscious culture. Below is a detailed guide of the essential tools and materials needed for the project, along with where to find them and recommendations for eco-friendly options.
General Tools List
1. Paint Scraper
A sturdy paint scraper is essential for manually removing loose or peeling paint from the deck surface. This tool helps you to scrape away paint from small or hard-to-reach areas.
2. Wire Brush
For areas where the paint is deeply embedded into the wood, a wire brush can help loosen tough layers. This tool is also handy for cleaning corners and grooves that may not be easily reached by larger tools.
3. Power Washer
A power washer is highly effective in stripping away layers of paint quickly. It uses high-pressure water to blast off old paint, dirt, and grime from the surface. Be sure to use the power washer at a safe distance to avoid damaging the wood underneath the paint.
4. Sandpaper or Electric Sander
Once the majority of the paint has been removed, you’ll need to sand the deck to create a smooth, clean surface. Hand-held sandpaper is useful for smaller areas, while an electric sander makes the job faster and easier on larger surfaces.
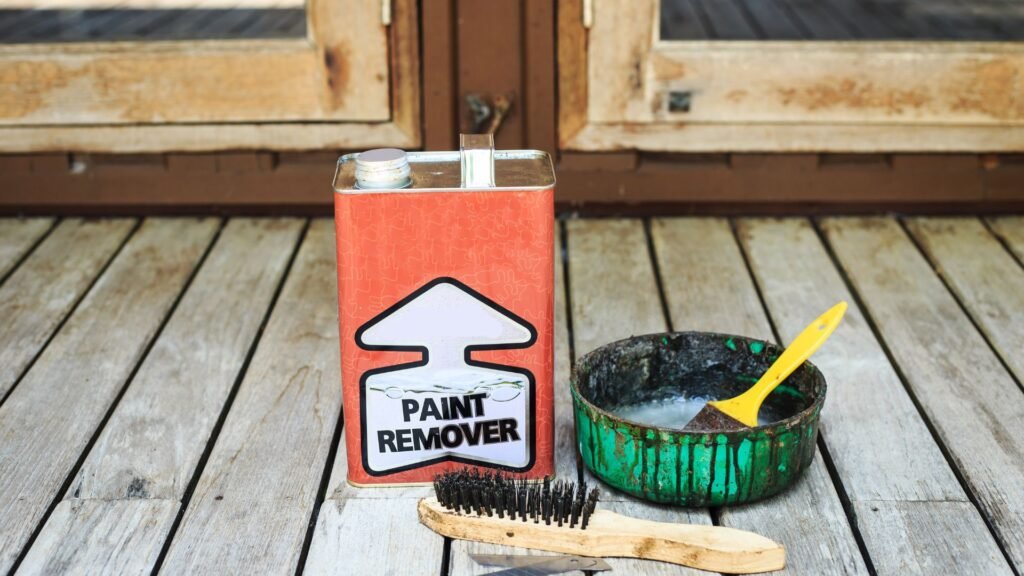
5. Deck Paint Remover
A quality deck paint remover is essential for breaking down stubborn paint layers that can’t be scraped off. When selecting a deck paint remover, biodegradable and eco-friendly options are strongly recommended to reduce environmental impact, especially considering New Zealand’s focus on sustainability. These removers are safe for plants and animals, ensuring your deck restoration process is as green as possible.
6. Protective Gear
Safety should always come first. When working with tools and paint-removal chemicals, it’s important to wear protective gear. This includes gloves to protect your hands, safety goggles to shield your eyes from debris or chemicals, and a mask to avoid inhaling dust or fumes.
NZ Availability
If you’re in New Zealand, sourcing these materials is easy. You can find everything you need at popular hardware stores such as Mitre 10 and Bunnings Warehouse, which are widely available across the country. Additionally, many of these tools and materials can be purchased from online suppliers, making it convenient to shop from home if needed.
When shopping at these stores, staff can also guide you towards the best tools for your specific deck type, whether it’s softwood or hardwood, ensuring that you use the right products for the job.
Eco-Friendly Products
New Zealand is known for its eco-conscious approach, and using environmentally friendly products is highly encouraged. For instance, when selecting a deck paint remover, look for biodegradable options that are safe for both plants and animals. These products not only ensure that your deck is free from harsh chemicals, but they also help protect the surrounding environment—something especially important in homes with gardens or when living near water sources.
Using eco-friendly alternatives helps minimize the harmful impact on local ecosystems, which aligns with the country’s dedication to sustainability and environmental protection.
In summary, the right tools and materials are crucial for successfully removing deck paint. By sourcing your materials from local stores and opting for eco-friendly products, you can tackle your deck restoration project efficiently while contributing to a greener, healthier New Zealand.

Step-By-Step Guide To Removing Paint From A Deck
Maintaining a deck is essential for its longevity, and removing old or peeling paint is a critical part of that process. Whether you’re planning to repaint or simply refresh the natural wood, here’s a detailed, step-by-step guide to help you remove paint from your deck efficiently and effectively.
Step 1: Prepare the Area
Before jumping into paint removal, proper preparation is crucial to ensure that your work is both efficient and safe.
- Clear and Clean: Start by removing all outdoor furniture, potted plants, and decorative items from your deck. This will give you full access to the deck surface. Then, thoroughly sweep the deck to eliminate any dirt, leaves, or debris. Cleaning the area ensures that you’re only working on the paint and not battling against grit or grime during the removal process.
- Protection: Protect the surrounding areas by covering nearby plants, walls, or structures. You can use plastic sheeting or drop cloths to shield them from potential chemical splashes or flying debris. This is especially important if you’re using a chemical paint remover or power washer. Additionally, if your deck is close to your garden, ensure any runoff doesn’t contaminate your soil or plants.
- NZ Tip: In New Zealand, it’s particularly important to be mindful of water runoff during the cleaning or paint removal process. Ensure you’re not allowing harmful chemicals to enter waterways or gardens, which could negatively impact the environment.
Step 2: Manual Paint Removal Techniques
Manual removal is one of the least invasive ways to start, and it can help you tackle peeling or loose paint before turning to more intense methods.
- Using a Paint Scraper: A paint scraper is a handy tool for removing paint that’s already starting to peel. Hold the scraper at a slight angle, applying steady pressure to lift the loose paint without gouging the wood. For best results, start with gentle strokes and increase pressure if needed. Always work with the grain of the wood to avoid damaging it.
- Wire Brush: For areas where paint is more stubborn, using a wire brush can help dislodge those patches. Scrub gently in a circular motion over tough spots, but be cautious not to scrub too hard, as this could damage the wood surface. A wire brush is particularly useful for getting into grooves or textured areas of the deck where a scraper might not reach.
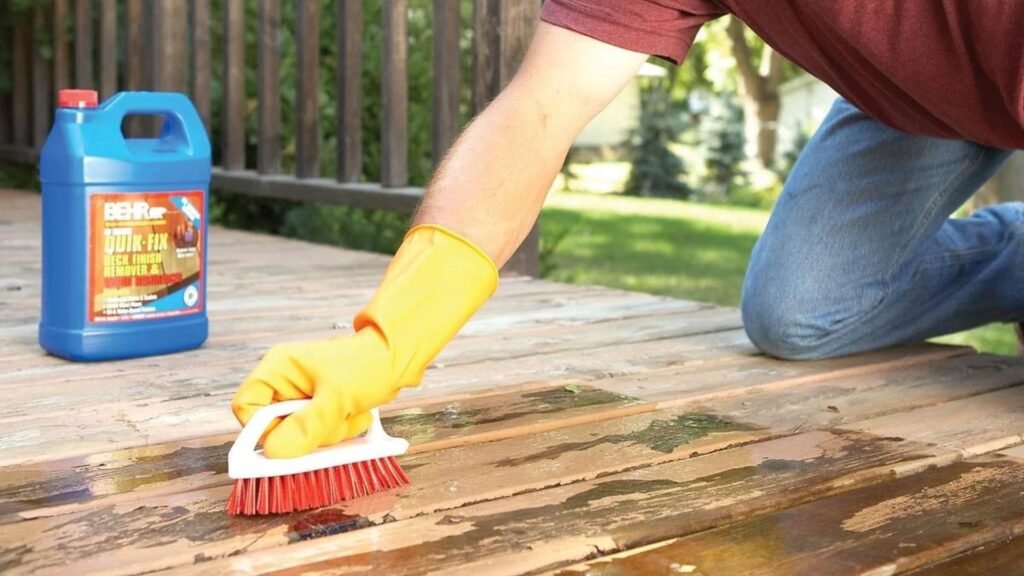
Step 3: Using a Chemical Paint Remover
If manual scraping and brushing don’t fully remove the paint, a chemical paint remover can do the heavy lifting for you. Here’s how to use it effectively:
- Choosing a Product: Select a chemical paint remover specifically designed for decks, ensuring that it’s safe for outdoor use and environmentally friendly. Biodegradable paint removers are a good choice, as they minimize the environmental impact. Look for products labeled as non-toxic or suitable for wood surfaces, especially if your deck is near plants or water sources.
- Application: Carefully follow the manufacturer’s instructions for applying the paint remover. Typically, you’ll need to brush or roll the product onto the painted areas, making sure to cover the surface evenly. Allow the remover to sit for the recommended period (often 20-30 minutes) to soften the paint.
- Removal Process: Once the paint has softened, use a scraper to lift it from the wood. For more stubborn sections, you might need to reapply the remover or use a wire brush to work it into the wood grain. Be patient during this step, as rushing could cause damage to the wood.
Step 4: Power Washing
After you’ve manually removed as much paint as possible, a power washer can help eliminate the remaining paint, dirt, and debris, leaving your deck clean and ready for the next steps.
- Power Washing Basics: Power washing is an efficient way to remove paint, but it requires proper technique. Hold the washer’s nozzle at a 45-degree angle to the deck surface, maintaining a safe distance (usually around 30 cm) to avoid damaging the wood. Use a lower PSI setting to start, around 1500-2000 PSI, to gently blast away any remaining paint. Always work in smooth, overlapping strokes, moving along the grain of the wood.
- Caution: Be careful not to set the pressure too high, as excessive force can strip away not only the paint but also the top layer of wood, leading to splintering or gouges.
- NZ Consideration: If you don’t own a power washer, no need to worry! In New Zealand, you can easily rent one from local hardware stores like Bunnings or Mitre 10. Renting can save you money while still giving you access to professional-grade tools.
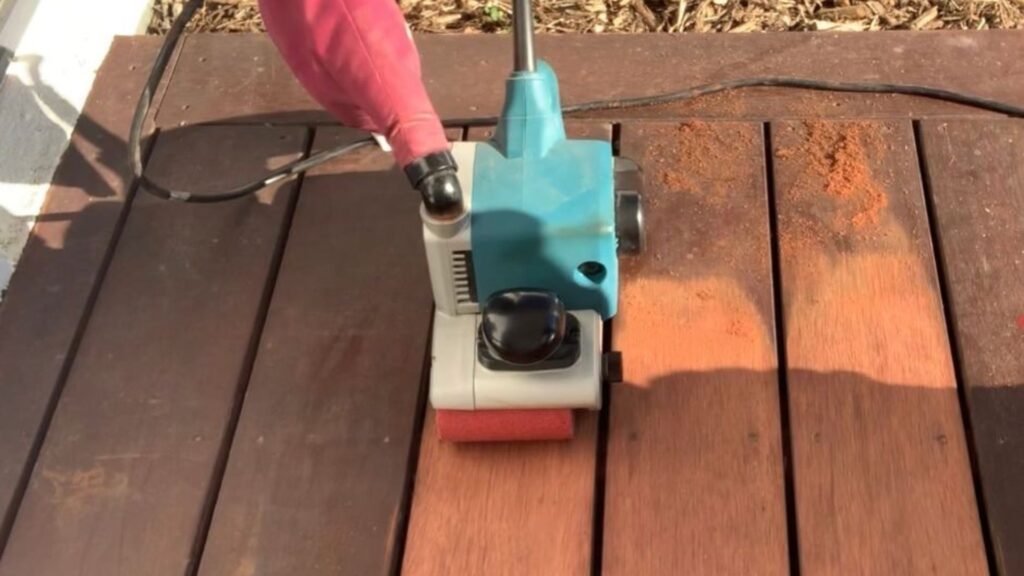
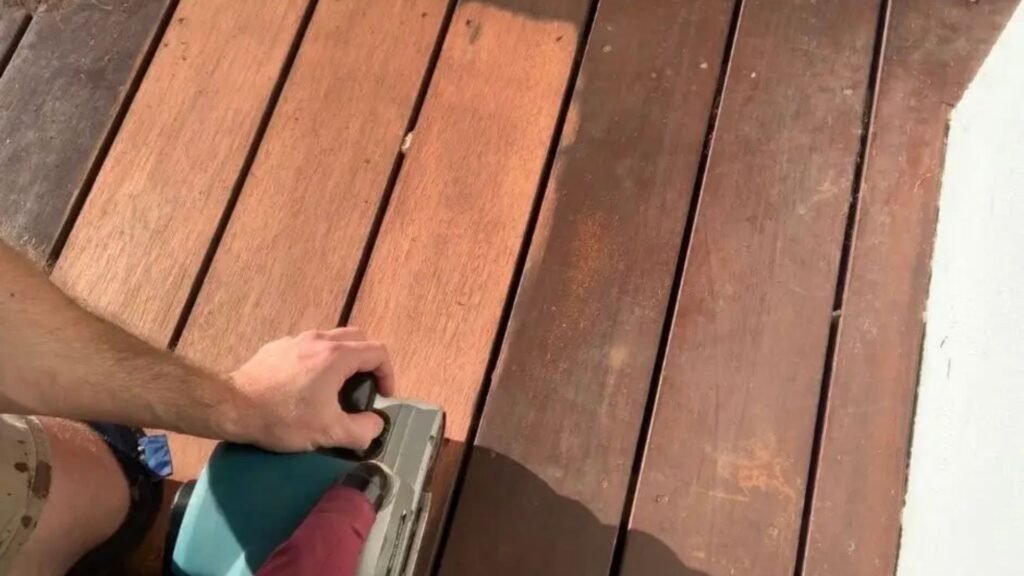
Step 5: Sanding the Deck
Once most of the paint is removed, sanding the deck ensures a smooth finish, preparing the surface for either new paint or stain.
- Why Sanding Is Important: Sanding removes any lingering bits of paint and smooths out the wood, which might have been roughened during the scraping or power washing stages. This step is essential to achieving an even surface, ensuring the new paint or stain will adhere properly.
- Hand Sanding vs. Power Sanding: For smaller decks or detailed areas, hand sanding may suffice. It allows for greater control, particularly in tight corners or intricate designs. However, for larger decks, power sanding is far more efficient. Using an electric sander speeds up the process and provides a more consistent finish across large areas.
- NZ Tip: If you have a larger deck, it’s more time-efficient to rent an electric sander from your local hardware store. Renting these tools can save you time and effort, ensuring a smooth and professional finish.
Removing paint from a deck is a multi-step process that requires careful planning and the right techniques. By following this guide, you’ll ensure that your deck is properly prepared for its next treatment, whether that’s a fresh coat of paint or stain. Keep in mind local environmental considerations and always choose eco-friendly products when possible to minimize your impact on surrounding areas. With the right tools and approach, your deck will be looking great and ready to withstand the elements for years to come.
Tips For Protecting The Environment During Paint Removal
When it comes to paint removal, taking eco-friendly steps is crucial not only for the health of our surroundings but also for ensuring that we protect New Zealand’s unique environment. Below are essential tips to help you remove paint responsibly and sustainably, keeping both the land and waterways safe from harmful chemicals.
1. Use Eco-Friendly Paint Removal Products
One of the most impactful ways to protect the environment during paint removal is to choose eco-friendly, non-toxic products. Many conventional paint removers contain harsh chemicals like methylene chloride, which can be harmful to both the environment and your health. Opting for biodegradable, non-toxic alternatives helps minimize the release of toxic substances into New Zealand’s delicate ecosystems.
These eco-friendly products are designed to break down safely without damaging the country’s native plants or contaminating waterways. By choosing greener options, you’re actively contributing to the protection of New Zealand’s unique biodiversity. Look for labels that indicate the product is free from harmful chemicals and is certified as environmentally safe.
2. Proper Disposal of Paint and Chemical Waste
After successfully removing paint, it’s important to dispose of the waste responsibly. Paint chips, debris, and leftover chemicals should never be washed down drains or left in the open where they can leach into the ground and water systems. New Zealand has specific regulations governing the disposal of hazardous materials, so it’s important to follow these guidelines closely to avoid legal repercussions and environmental harm.
Start by contacting your local council or waste disposal service for guidance on how to dispose of paint and chemicals properly. Many regions offer collection points for hazardous waste, ensuring that it is handled and processed in a way that prevents contamination of the environment. You can also consider using absorbent materials, such as kitty litter, to safely contain liquid waste before disposing of it in a designated area.
3. Water Conservation During Paint Removal
Water conservation is another critical factor to consider during paint removal, especially if you’re using methods like pressure washing. High volumes of water can be wasted if not managed properly, contributing to water scarcity in some areas and potentially washing harmful chemicals into storm drains and natural waterways.
To reduce water waste, try using the lowest pressure setting possible on your power washer, only using as much water as is necessary to remove the paint effectively. You can also capture and reuse water runoff by setting up a containment system that prevents it from entering storm drains or nearby water bodies. Additionally, if you’re working in an area where water scarcity is an issue, consider switching to dry paint removal methods like scraping or sanding, which require little to no water.
By taking a few thoughtful steps, you can ensure that your paint removal process is eco-friendly and aligned with New Zealand’s environmental values. Choosing non-toxic products, responsibly disposing of waste, and conserving water are all key to protecting the country’s native plants and waterways. Remember, every small effort makes a difference when it comes to preserving the environment for future generations.
Post-Removal Care: Prepping For Repainting Or Staining
Once you’ve successfully removed old paint or stain from your deck, it’s essential to take the right steps before applying a new finish. Proper post-removal care ensures a smooth, long-lasting result, especially given the unique weather conditions in places like New Zealand. Let’s dive into how to properly prepare your deck for repainting or staining, starting with cleaning and ending with choosing the perfect new finish.
Deck Cleaning: Removing Residue for a Fresh Start
After paint removal, thoroughly cleaning your deck is crucial to remove any leftover paint chips, chemicals, or debris. A clean surface ensures that the new paint or stain adheres well, preventing issues like peeling or bubbling later on. Start by sweeping the deck to clear away dust and dirt. Then, use a deck cleaner or a mild detergent mixed with water to scrub the surface. Pay special attention to cracks and crevices where residue can hide.
For stubborn spots, consider using a pressure washer, but be cautious not to damage the wood. After cleaning, rinse the deck thoroughly to remove any soapy residue, as leftover chemicals can interfere with the adhesion of new coatings. This step is essential for a professional-looking finish, as even the smallest remnants can affect the quality of the final product.
Drying Time: Patience Pays Off
Once your deck is spotless, allowing ample drying time is critical, especially in New Zealand’s frequently humid climate. Humidity can extend drying times, so it’s essential to be patient. Wait at least 24 to 48 hours for the wood to fully dry before moving on to the next steps. If the wood is still damp, applying paint or stain can lead to uneven absorption and potential mold growth.
A good tip is to check the weather forecast and aim to clean your deck on a dry, sunny day. Ensuring the deck is completely dry will not only make the new finish adhere better but also prevent moisture-related problems down the line.
Choosing a New Finish: Durability Meets Style
When it comes to choosing a new finish for your deck, New Zealand’s climate is an important factor to consider. With the strong UV rays and unpredictable weather, you’ll want to select a high-quality, UV-resistant paint or stain to protect your deck from sun damage and fading. Oil-based stains are a popular choice as they penetrate deeply into the wood, offering long-lasting protection. Alternatively, water-based stains are easy to apply and clean, while also providing good durability.
Look for products specifically designed for outdoor use in regions with harsh climates, ensuring your deck remains protected from both sun and rain. Brands that offer UV protection, water resistance, and mildew inhibitors are highly recommended. Also, think about the aesthetic—whether you prefer a natural wood look, which stains provide, or a more vibrant color from a paint.
Final Sanding: Achieving a Smooth, Even Surface
Before applying your chosen finish, lightly sand the entire surface of your deck. This step helps smooth out any rough patches or imperfections that may have occurred during paint removal or cleaning. Sanding also opens up the wood grain, allowing better absorption of the paint or stain, which contributes to a more even, long-lasting finish.
Be sure to use fine-grit sandpaper for this process, and always sand along the wood grain to avoid scratches. After sanding, remember to sweep or wipe down the deck again to remove any dust created during the process.
By following these post-removal care steps, you’re setting the stage for a beautiful, durable finish on your deck that will stand up to New Zealand’s elements. From cleaning and drying to choosing the right finish and final sanding, every detail matters in ensuring your deck looks great and lasts for years to come.
Common Mistakes To Avoid
When it comes to stripping paint from wood, there are a few common mistakes that many people make. Avoiding these errors can save you time, effort, and unnecessary damage to your wood surface. Here’s a closer look at what you should watch out for during the paint stripping process.
1. Using Excessive Pressure with a Power Washer
A power washer can be a helpful tool when removing paint, but many people make the mistake of using too much pressure. The wood may look tough, but applying excessive force can easily damage its surface. High pressure can cause the wood fibers to splinter, resulting in an uneven texture that’s difficult to smooth out later. Stick to a lower pressure setting, and always test a small area first to ensure you’re not harming the wood. In most cases, a gentle stream will do the job without causing long-term damage.
2. Skipping the Sanding Step
Sanding is often overlooked, especially by those eager to complete their project quickly. However, skipping this critical step can lead to a range of issues. Sanding is essential because it smooths the wood’s surface after the paint is removed, ensuring an even, polished finish. Without sanding, the surface may remain rough, and any new paint or stain applied will highlight those imperfections. Additionally, sanding helps to remove any leftover paint remnants that may not have come off during the stripping process. So, take the time to sand your wood thoroughly, using the right grit paper for the type of wood you’re working with.
3. Rushing the Process
One of the biggest mistakes you can make is rushing through the paint stripping process. While it might be tempting to speed things up, especially when using chemical removers, patience is key to achieving the best results. Paint removers need time to break down the paint layers, and cutting corners here will likely leave you with uneven results or areas where the paint hasn’t fully lifted. Additionally, once the stripping is done, the wood needs adequate time to dry before any new finish can be applied. Rushing this drying period could lead to moisture being trapped in the wood, affecting the adhesion of paint or stain. Always allow for proper drying times and follow the manufacturer’s recommendations on any products you’re using.
By avoiding these common mistakes—using too much pressure with a power washer, skipping sanding, and rushing the process—you’ll ensure that your paint stripping project yields professional-looking results. Take your time, use the right tools, and give the wood the care it deserves to preserve its natural beauty.

FAQs: About How To Remove Paint From Deck NZ
How long does it take to remove paint from a deck?
The time required to remove paint from a deck depends on factors such as the deck’s size, the condition of the existing paint, and the removal method used. Manually scraping or sanding a small deck could take a day, while using chemical removers or power washers on larger decks may take a few days, allowing time for drying and additional touch-ups.
Can I paint over old paint without removing it?
Yes, if the old paint is in good condition and free from peeling or flaking, you can paint over it. However, for the best results and longevity, it is recommended to remove old paint, especially if it’s worn, cracked, or incompatible with the new paint type. Removing the old paint ensures a smoother, longer-lasting finish.
What are the best eco-friendly paint removers for decks in New Zealand?
Some popular eco-friendly paint removers available in New Zealand include Citrus-based strippers and biodegradable gel removers. Products like Citristrip or Dumond Smart Strip are safe for the environment, effective on paint, and widely available at local hardware stores like Mitre 10 or Bunnings.
Is power washing safe for my wooden deck?
Power washing can be a safe and effective way to remove paint from your deck if used correctly. Keep the pressure below 2,000 PSI and use a wide nozzle to avoid damaging the wood. Stand about 30-40 cm away from the surface while washing. Too much pressure or using a narrow nozzle can cause splintering or gouging.
How do I dispose of old paint and chemical removers safely in New Zealand?
It’s important to dispose of old paint and chemical removers according to local environmental regulations. Many regions in New Zealand have collection points for hazardous waste. Contact your local council or waste management services to find out where to safely dispose of these materials, or take advantage of hazardous waste collection events.
Do I need to sand the deck after removing paint?
Yes, sanding is a crucial step after removing paint from your deck. It helps smooth the surface, removes any leftover paint residue, and prepares the wood for the next coat of paint or stain. Use fine-grit sandpaper (80-120 grit) for the best results, ensuring an even and smooth finish.
What kind of paint or stain is best for decks in NZ’s weather conditions?
In New Zealand, look for UV-resistant, weatherproof deck paints or stains designed for outdoor use. Water-based stains or paints are often recommended due to their durability and eco-friendliness. Brands like Resene and Wattyl offer deck treatments specifically formulated to withstand harsh UV rays and frequent rain.
Can I remove deck paint in cold or rainy weather?
It’s best to remove paint from a deck when the weather is dry and temperatures are moderate. Cold or rainy weather can interfere with the effectiveness of chemical paint removers and may cause moisture to get trapped in the wood, which can affect the quality of any new paint or stain applied afterward.
What safety precautions should I take when using chemical paint removers?
When using chemical paint removers, always wear protective gloves, goggles, and a face mask to avoid contact with chemicals. Work in a well-ventilated area, preferably outdoors, and follow the manufacturer’s safety instructions. Be cautious of runoff and take care to cover nearby plants or sensitive areas to prevent damage.
What is the most efficient way to remove paint from a large deck?
For large decks, the most efficient method is to use a combination of a chemical paint remover and a power washer. Apply the paint remover to loosen the old paint, then use a power washer to quickly remove the softened paint from large areas. Afterward, sand the deck to smooth the surface and prepare it for a fresh coat of paint or stain.
Conclusion
In conclusion, removing old paint from your deck is a straightforward process that can breathe new life into your outdoor space. By following the key steps—preparing the area, choosing between manual or chemical paint removal methods, sanding for a smooth finish, and applying proper post-removal care—you can achieve professional results. Taking the time to refresh your deck not only enhances its appearance but also extends its lifespan, making it a worthwhile investment. If you have any questions or experiences to share, feel free to comment below. And don’t forget to check out our related guides like “Best Deck Paints for NZ Weather” or “DIY Deck Maintenance Tips” for more helpful advice.
About the Author:
Mike Veail is a recognized digital marketing expert with over 6 years of experience in helping tradespeople and small businesses thrive online. A former quantity surveyor, Mike combines deep industry knowledge with hands-on expertise in SEO and Google Ads. His marketing strategies are tailored to the specific needs of the trades sector, helping businesses increase visibility and generate more leads through proven, ethical methods.
Mike has successfully partnered with numerous companies, establishing a track record of delivering measurable results. His work has been featured across various platforms that showcase his expertise in lead generation and online marketing for the trades sector.
Learn more about Mike's experience and services at https://theleadguy.online or follow him on social media: